Enter a Custom Rate Base
Overview
A custom rate base holds rates that may be too complex to easily enter directly in the contract entry forms. For example, a standard ProTrans consolidation rate contract is a CWT rate tiered by both mileage and weight with minimum and maximum charges based on mileage. Rather than create a separate tier for each cell in the rate matrix, a custom rate base can be created that is then referenced in the contract. Unlike standard tiers, rate bases can use any type of tiering, can be restricted by origin and destination location, can include a maximum charge, and can be reused across any number of contracts without being recreated for each.
Process
- Click Maintenance.
- Click Rate Bases.
- Click Custom Rates.
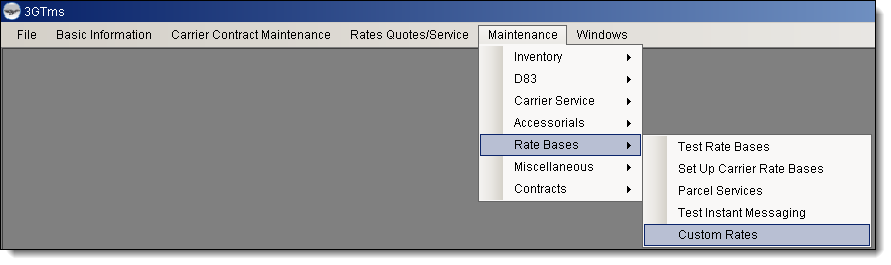
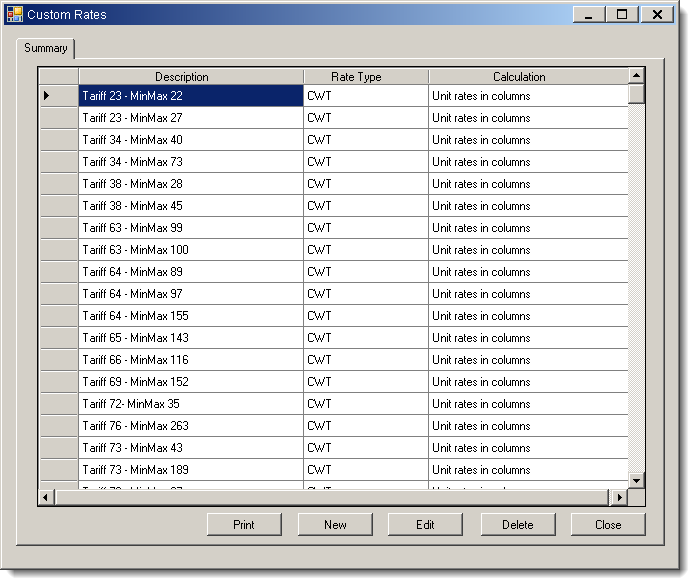
The Custom Rates window opens to the Summary tab.
To Add a Custom Rate Base:
- Open the Custom Rates window. See To Access Custom Rates:, above.
- Click New.

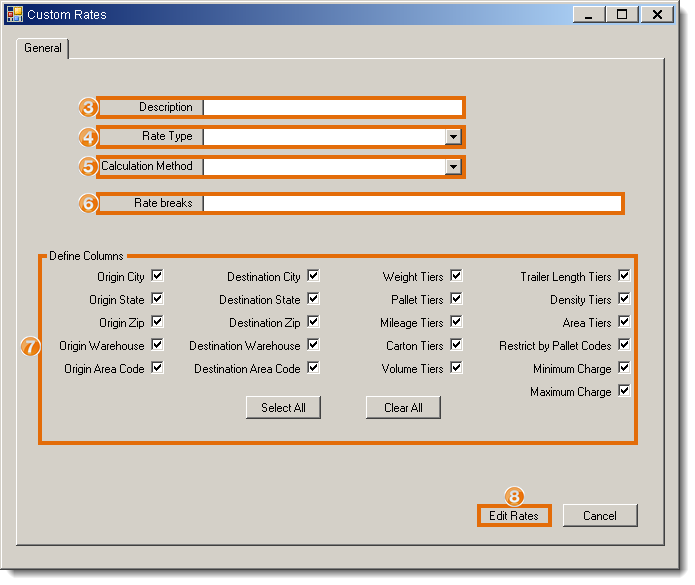
The General tab opens.
- Enter a Description for the rate base. This is the only information that will appear when selecting a rate base for a contract.
- Select a Rate Type. The rate base will only be available to strategies with the same rate type.
- Select a Calculation Method. The available options are as follows:
- Unit Rate in Columns will multiply the provided rate by the measurement referenced in the rate type.
- Total Rate in Columns will use the provided rate as the total rate for any matching shipment.
- Cumulative Unit Rate in Columns will use each column in succession to determine the rate for the shipment. For example, a 1,500 lb. shipment using a CWT rate with rate breaks at 0, 500, and 1000 will be rated using sum of the 0 rate for 499 pounds (0-499), the 500 rate for 500 pounds (500-999), and the 1000 rate for 501 pounds (1000-1500).
- Enter any Rate breaks separated by commas, if needed. The unit of measurement used to determine the rate breaks varies with the rate type. For example, a ProTrans consolidation contract has rate tiers for 0-499 lbs, 500-999 lbs, 1000-1999 lbs, 2000-4999 lbs, 5000-9999 lbs, and over 10000 lbs. Its rate breaks would be entered as 0,500,1000,2000,5000,10000.
- Define Columns that contain data that should exist in the rate base. A column is automatically added for each rate break.
- Click Edit Rates.
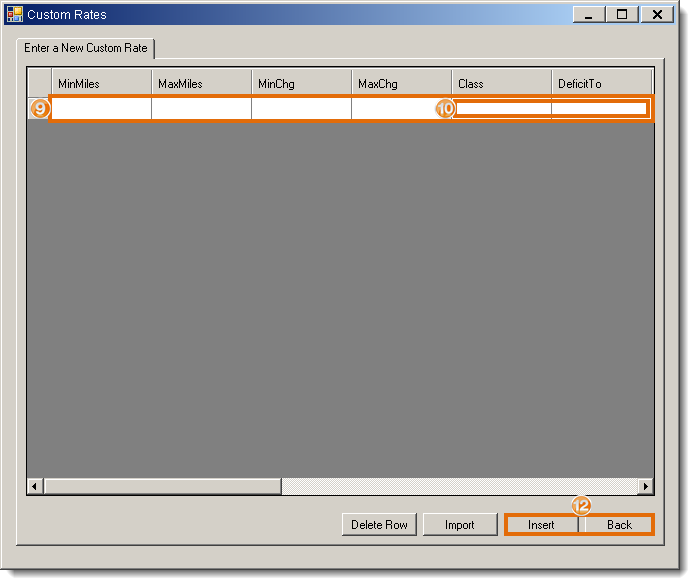
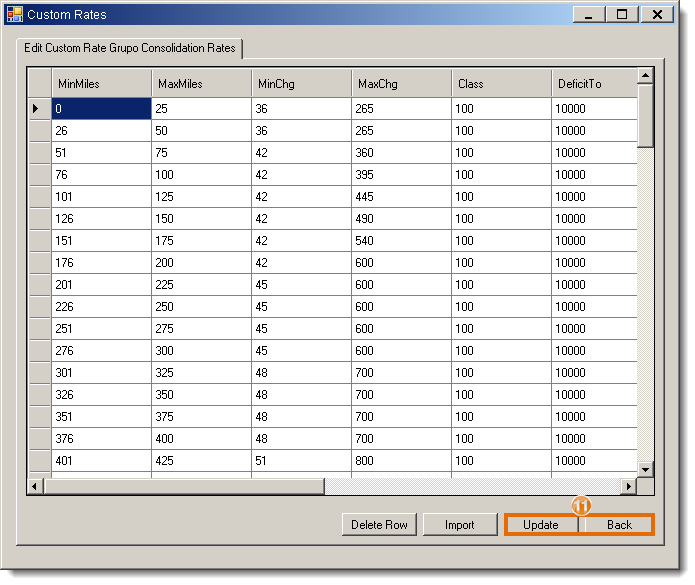
The Edit Custom Rate tab opens.
- Enter values in the cell for each column. The available columns will vary based upon the columns selected in step 7. Use the scroll bar or tab key to reach columns outside the viewing pane.
- Enter values in Class and DeficitTo if editing a CWT rate base. Class is the NMFC class to which this row applies, and DeficitTo is the highest weight that is checked for deficit weight rating. Enter 0 for Class if the row should apply to all classes.
- Repeat steps 9 and 10 for every additional row required for the rate base. New rows will be added automatically as data is entered.
- Click Insert to save or Back to cancel.
To Edit a Custom Rate Base:
- Open the Custom Rates window. See To Access Custom Rates:, above.
- Click Edit.
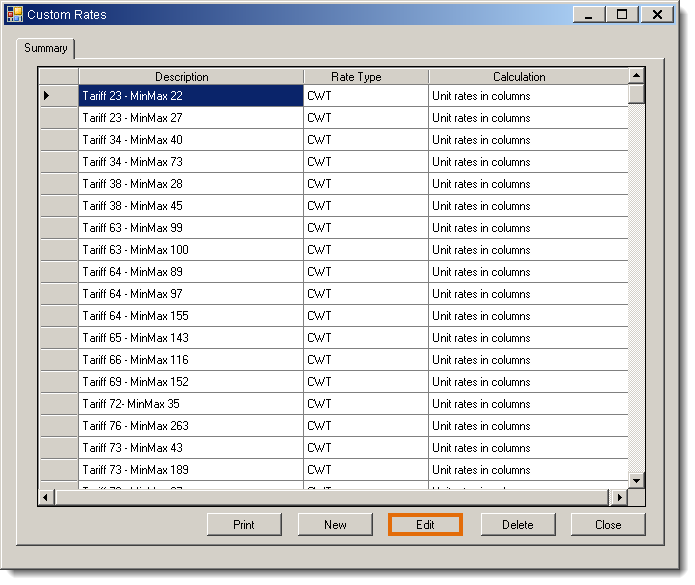
- Make any needed changes on the General Tab.
- Click Edit Rates.
- Modify any rows on the Edit Custom Rate tab as needed.
- Click Update to save the changes or Back to cancel.
To Import Rate Data from a CSV File:
- Access the Edit Custom Rate tab of a new or existing rate.
- Click Import.
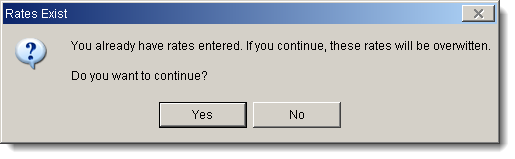
- If rates exist, a warning will appear. Importing rates from a spreadsheet will overwrite all existing rates in the rate base. Click Yes to discard the current rates or No to keep them and cancel the import.
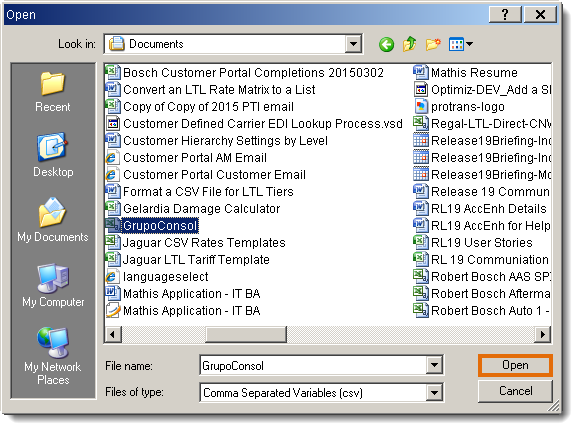
The Open dialogue box appears.
- Find the file to import and click Open. The selected CSV file must contain a header row that will be used as column names.
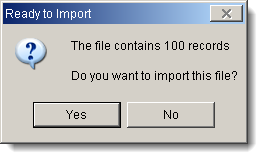
The Ready to Import confirmation box appears.
- Click Yes to complete the import or No to cancel.
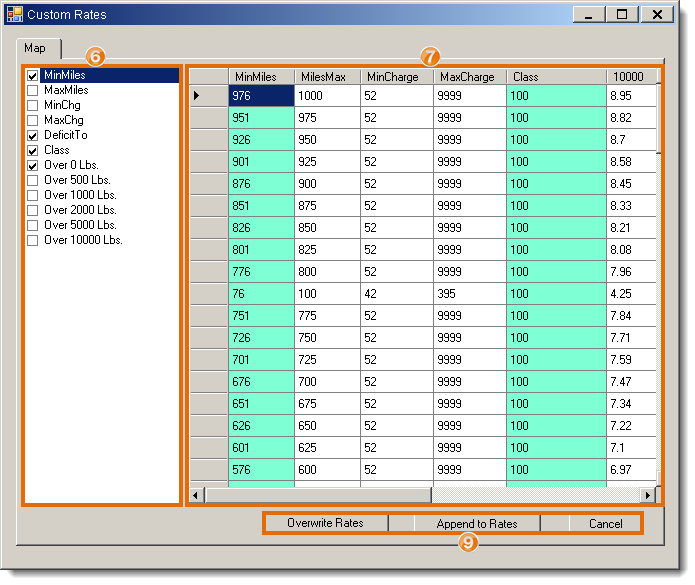
The Map tab opens. Mapping will be completed automatically for any column headers in the CSV file that match the defined columns in Contract Manager.
- Select an unmapped rate base column from the left pane. Mapped columns have a check mark beside them.
- Click the CSV column header in the right pane that contains the information that should appear in the selected rate base column. Columns highlighted in green have been mapped and will be imported into Contract Manager.
- Repeat steps 6 and 7 for all columns to be imported.
- Click Overwrite Rates to import and overwrite existing rates, Append to Rates to import and add to existing rates, or Cancel to stop the import.
The Edit Custom Rate tab opens with all imported columns filled.
- Enter values in any columns that were missing from the CSV file.
- Click Update to save changes or Back to discard them.
Result
The custom rate base is saved and available for use in any contract strategy of the same rate type.