Enter Product Warehouse Attributes
Process
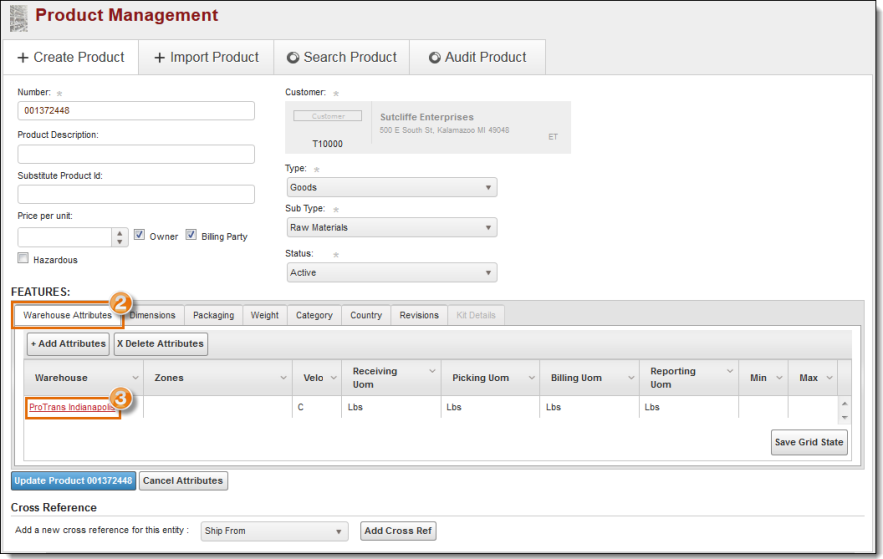
To Add New Warehouse Attributes:
Access Warehouse Attributes
- Access the product to be updated.
- Click Warehouse Attributes.
- Click Add Attributes.
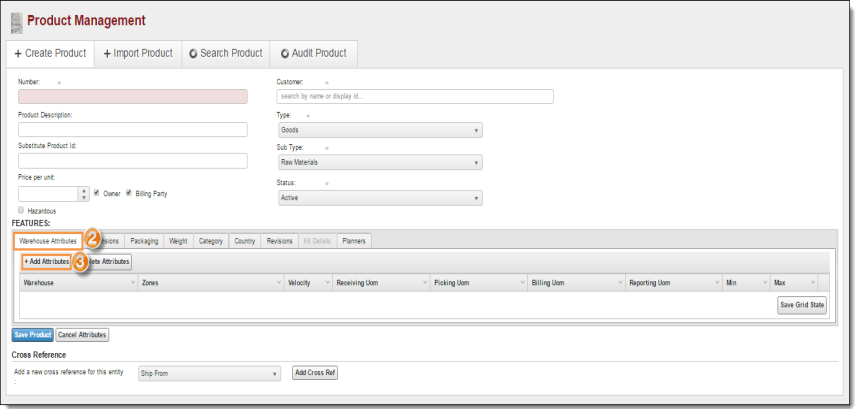
The Add Attributes pane opens.
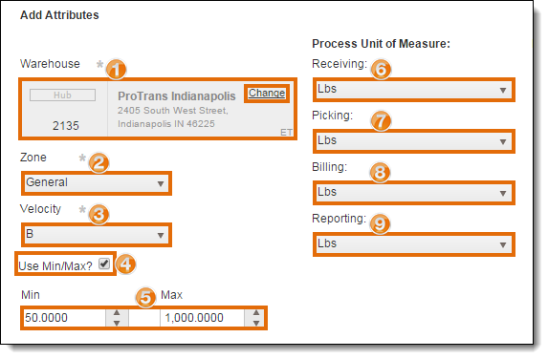
Add Attributes
- Search for and select the Warehouse for which attributes are being defined. By default, this is the user's current hub. The selected warehouse must be different from the warehouse of any existing attribute records. Click Change to select a different hub.
- Select the warehouse Zone for the product.
- Select the Velocity of the product in this warehouse.
- Select if the product should Use Min/Max amounts in this warehouse.
- Enter the Min and Max of the range the product should remain within in this warehouse.
- Select the Process Unit of Measure for Receiving the product if needed. Changing the Receiving Unit of Measure will change the unit of measure for Picking, Billing, and Reporting as well.
- Select the Picking unit of measure if needed.
- Select the Billing unit of measure if needed.
- Select the Reporting unit of measure if needed.
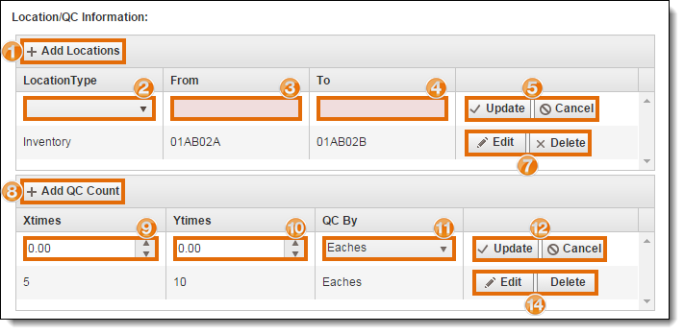
Add Locations and QC Counts
- Click Add Locations to add a location where the product is handled or stored in the warehouse if needed.
- Select the Location Type of the location.
- Search for and select the From location. Available options will vary based upon the selected Warehouse and Location Type.
- Search for and select the To location. Available options will vary based upon the selected Warehouse and Location Type.
- Click Update to save the location or Cancel to discard it.
- Repeat steps 1 - 5 for any other locations that must be added for the product.
- Click Edit to modify an existing location entry or Delete to discard it.
- Click Add QC Count to add a QC count for the product.
- Enter the Xtimes for the QC count.
- Enter the Ytimes for the QC count.
- Enter the QC By for the QC count.
- Click Update to save the QC count or Cancel to discard it.
- Repeat steps 8 - 12 for any other QC counts that must be added for the product.
- Click Edit to modify an existing QC count entry or Delete to discard it.
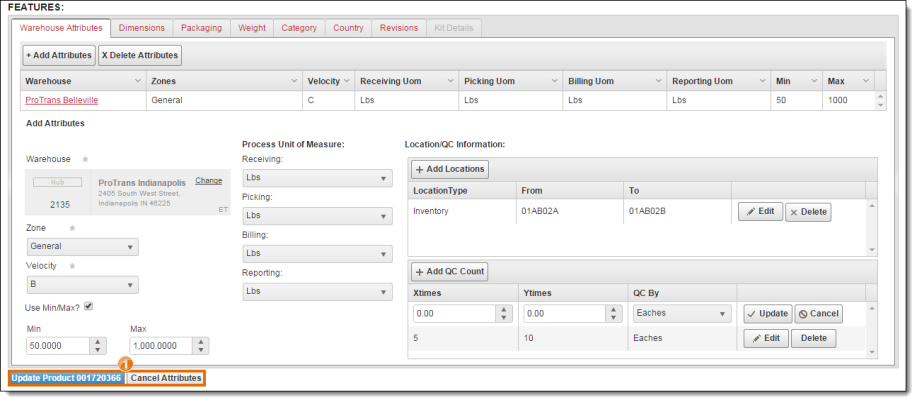
Confirm and Save Changes
- Click Update Product to save the warehouse attributes or Cancel Attributes to discard them.
To Edit Existing Warehouse Attributes:
- Access the product to be updated.
- Click Warehouse Attributes.
- Click the Warehouse whose attributes are to be modified.
The Update Attributes pane opens.
- Make any needed updates to the warehouse's attributes. See Add Attributes and Add Locations and QC Counts for details.
- Click Update Product to confirm the changes or Cancel Attributes to discard them.
Result
The attributes of the product are saved and assigned to the selected warehouse.