
Overview
In circumstances where an existing logistics plan does not meet your needs, you can submit an unplanned shipment request. If an unplanned shipment request repeats on a consistent basis, ask a ProTrans representative about creating a new logistics plan.
To Submit an Unplanned Shipment Request:
- Access the Tracking page. Track Shipments.
- Click Add Unplanned Shipment Request on the action bar.

- Select a responsible party from the Bill To dropdown.
- Type a location in the Responsible Location field and select it from the list.
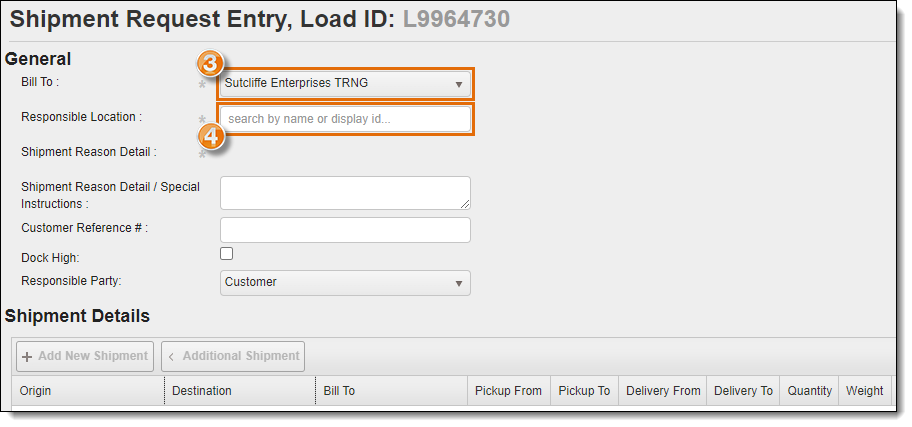
- Select a reason from the Shipment Reason Detail dropdown.
- Optionally, provide special instructions, enter a customer reference number, select the responsible party, and indicate if a dock-high truck is required for the pickup or delivery.
- Click Add New Shipment .

The Add/Edit Shipment dialog box opens.
Shipment Info - Origin & Destination Settings
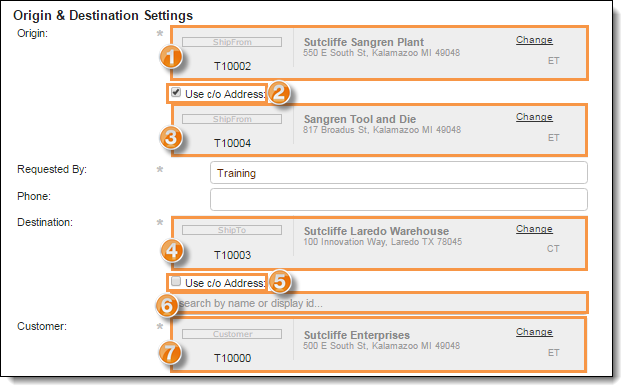
The origin and destination, or O/D Pair, of the shipment describe where the shipment is coming from and where it is going. If the O/D Pair has been set up properly in the Customer Hierarchy, all the other information in this section will be completed automatically.
- Search for and select the Origin. If the required location does not exist, click Create New Entity to create it. See Create a Ship From Entity for more details.
- Select Use c/o Address, if applicable. The Care Of entry field will become editable upon selection.
- Search for and select the Care Of for the Origin.
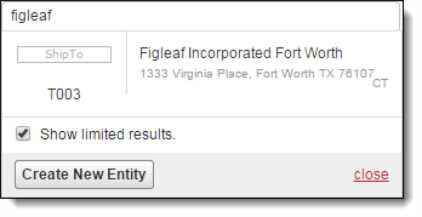
- Search for and select the Destination. By default, Optimiz will only display ShipTo entities that have an established Trading Partner relationship with the selected Origin in the Customer Hierarchy. To select a different ShipTo, deselect the Show limited results checkbox. If the required location does not exist, click Create New Entity to create it. See Create a Ship To Entity for more details.
- Select Use c/o Address, if applicable. The Care Of entry field will become editable upon selection.
- Search for and select the Care Of for the Destination.
- Search for and select the Customer, if needed. (Optimiz automatically fills this field if a relationship already exists between the Origin and Destination in the Customer Hierarchy.)
Shipment Info - Handling Units and References
The handling units of a shipment describe what is physically being moved. Handling unit information must be accurate to properly plan trailer utilization and for customer billing. (If default shipment items are defined in the Customer Hierarchy for the selected O/D Pair, these fields fill automatically.) If specific reference types are required for the shipment, they will be listed above the list of references.
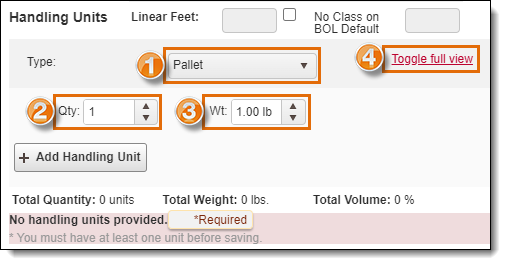
- Select the Type of handling unit, such as Pallet or Carton.
- Enter the Qty - the total of handling units of this type being shipped.
- Enter the Wt - the total weight of all handling units of this type being shipped.
- Click Toggle full view to display additional handling unit options.
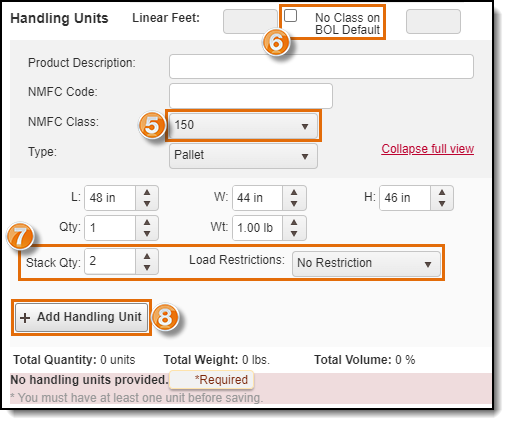
- Enter the NMFC Class.
- If the BOL image does not have the NMFC listed, check the No Class on BOL check box.
- Update the Stack Quantity and Load Restrictions if needed.
- Click Add Handling Unit to save the Handling Unit(s).
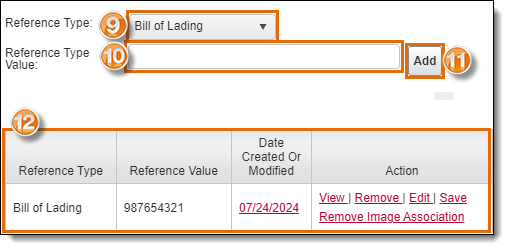
- Select the Reference Type.
- Enter the Reference Type Value.
- If adding a file or image with the reference, click Attach File and select a file from your computer.
- If a file or image is uploaded, it will appear next to the Attach File button.
- Click Add to save the Reference Type information and upload any selected documents.
- The reference added will appear below the Reference Type Value field.
- Follow steps 9-13 to add more references as needed.
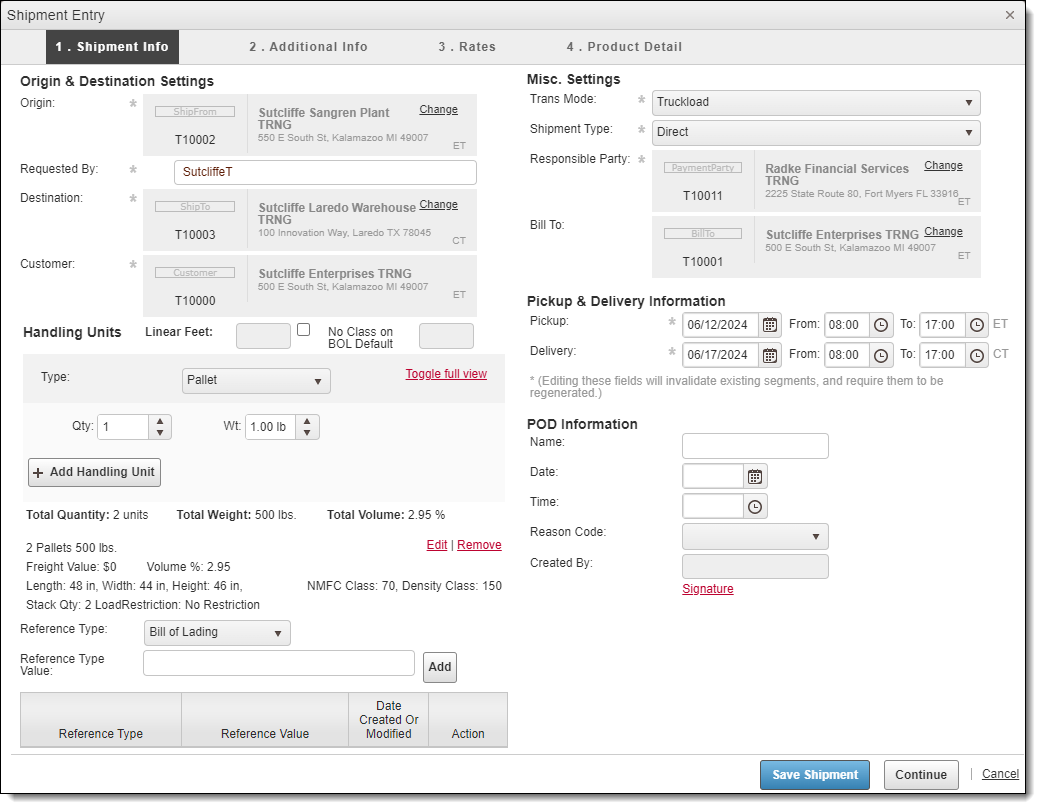
Shipment Info - Pickup & Delivery Information
The pickup and delivery information tells the carrier when they are expected to pick up and deliver the shipment.
After selecting a Pickup From date, Optimiz automatically calculates Pickup From time, Pickup To date and time, and all Delivery dates and times based on information in the Customer Hierarchy and Carrier entity, if available. Optimiz changes the pickup or delivery time if they are outside of the entity's operating hours.
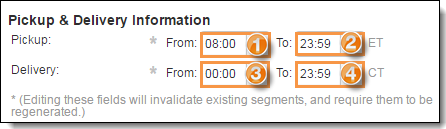
- Select the Pickup From
- Select the Pickup To
- Select the Delivery From
- Select the Delivery To
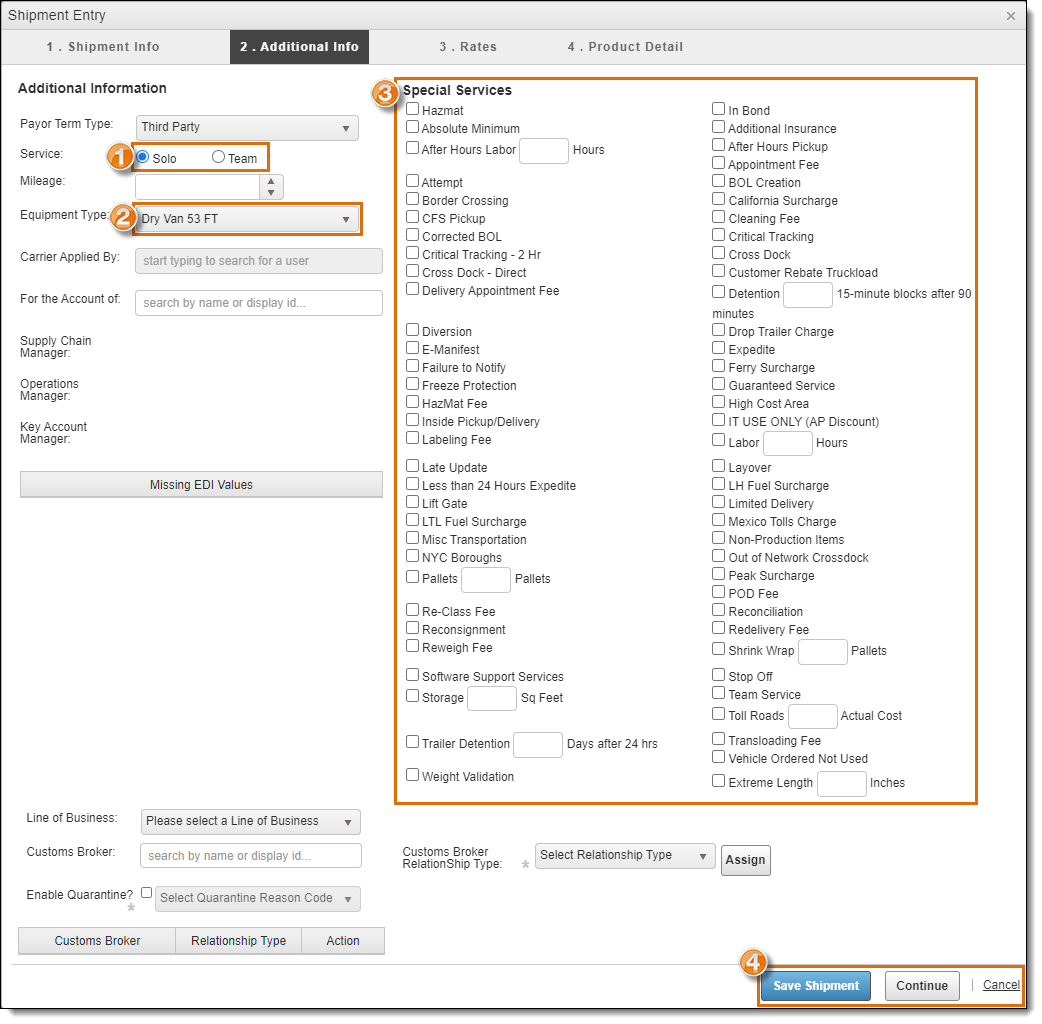
Additional Info
- Select the Service type of Team for team drivers or Solo for a solo driver.
- Select an Equipment Type. For single-shipment loads, this equipment type will automatically be applied to the load also.
- Check off any Special Services for the shipment. Depending on your selections, new fields will open further down the screen that will need to be filled out. See the Special Services section of this page for details.
- Click Save Shipment to create the shipment or Cancel to discard the shipment.
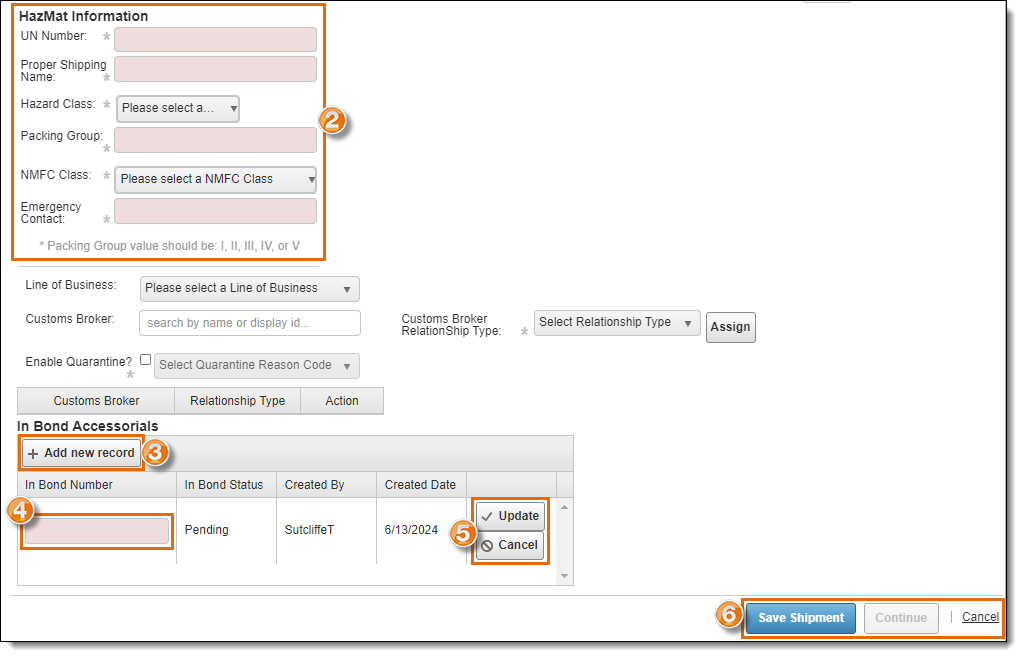
Special Services
- Select the check boxes for any required Special Services as outlined in the Additional Info section above.
- Enter the HazMat Information for the shipment if Hazmat special service is required.
- Click Add New Record if In-Bond special service is required.
- Enter the In Bond Number if In-Bond special service is required.
- Click Update to save the In-Bond Number or Cancel to discard it.
- Click Save Shipment to create the shipment or Cancel to discard it.
The Shipment Entry window closes and the shipment created appears in the Shipment Details grid.
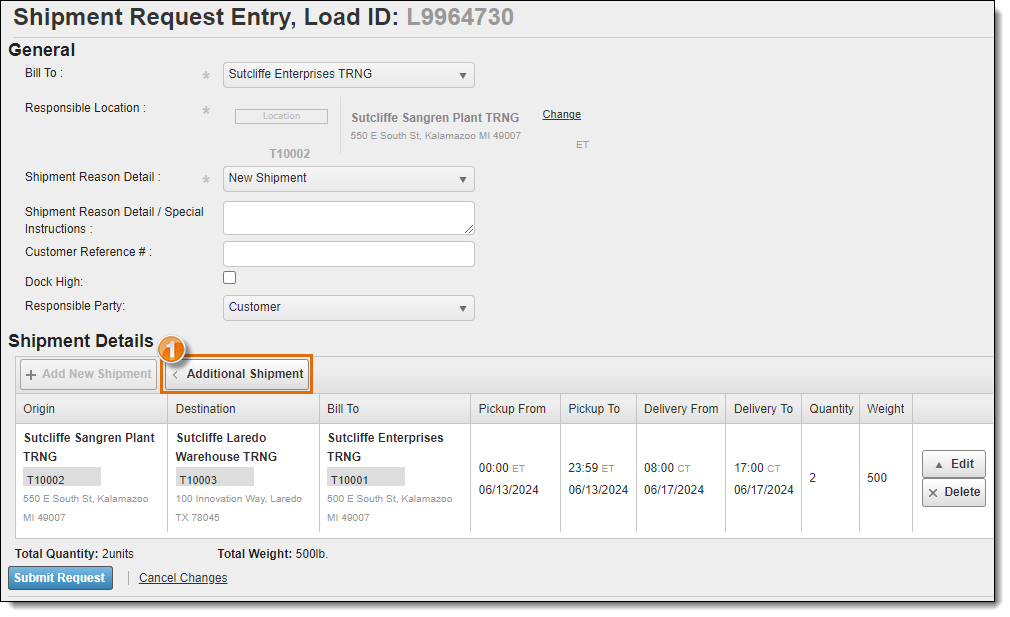
Additional Shipments
Additional shipments can be added to a single shipment request in cases where the load being requested has multiple stops (milk run) or is a round trip (beginning and ending at the same location).
To Add Additional Shipments to an Unplanned Shipment Request for a load with multiple stops:
- Click Additional Shipment.
- Enter the shipment information following the previous steps and repeat for each additional shipment.
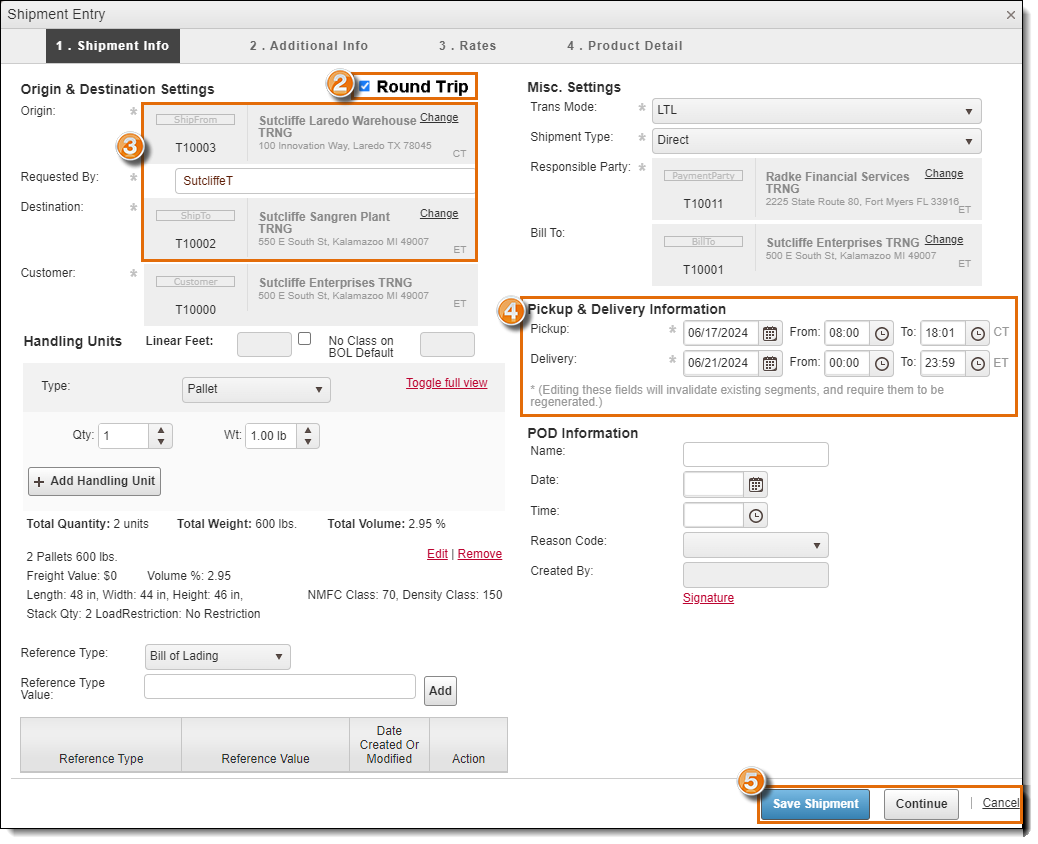
To Add Additional Shipments to an Unplanned Shipment Request for a round trip load:
- Click Additional Shipment.
- Check the Round Trip check box.
- The shipment will automatically populate with the origin and destination of the first shipment in reverse order.
- Enter the Pickup and Delivery Information as shown in the Shipment Info - Pickup & Delivery Information section above.
- Click Save Shipment to create the shipment or Cancel to discard it.
The Shipment Entry window will close.
- After all required shipments have been added, click Submit Request.
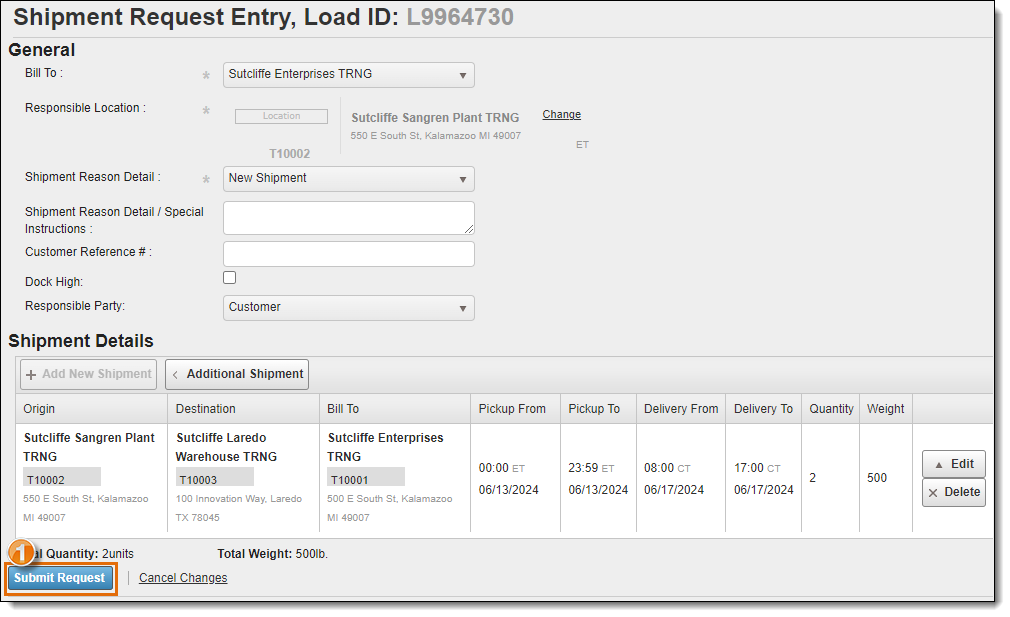
Result
The shipment request is submitted containing all the shipments entered.