Submit a Change Plan Load Request
Overview
A request to change a load’s pickup date and time windows, as well as a shipment’s handling units, can be requested by submitting a Change Plan Load Request.
The customer portal account must be authorized to submit a change plan load request on a load. In general, if your location does not receive the bill for a load, you cannot request that it be changed. Attempting to submit a change request on a load if the portal is not authorized will produce an error message.
A Change Plan Load Request can be submitted at any time prior to the load being picked up (also called In Transit status).
You can request to change the following components of a load or shipment through a Change Plan Load Request:
- Pickup and Delivery date and time windows.
- Add a handling unit.
- Remove a handling unit
- Change a handling unit.
Process
To Submit a Change Plan Load Request:
- Access the Track and Trace page. Track Shipments.
- Find the load by building and running a search. Build a Custom Search.
- Click the load you to be changed.
- Click Change Plan Load Request in the action bar.

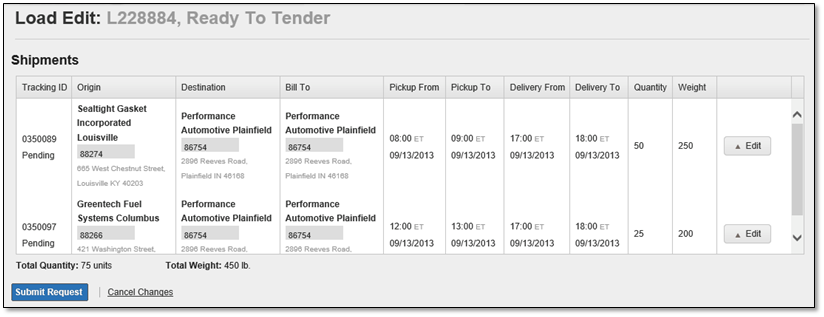
The Load Edit page opens:

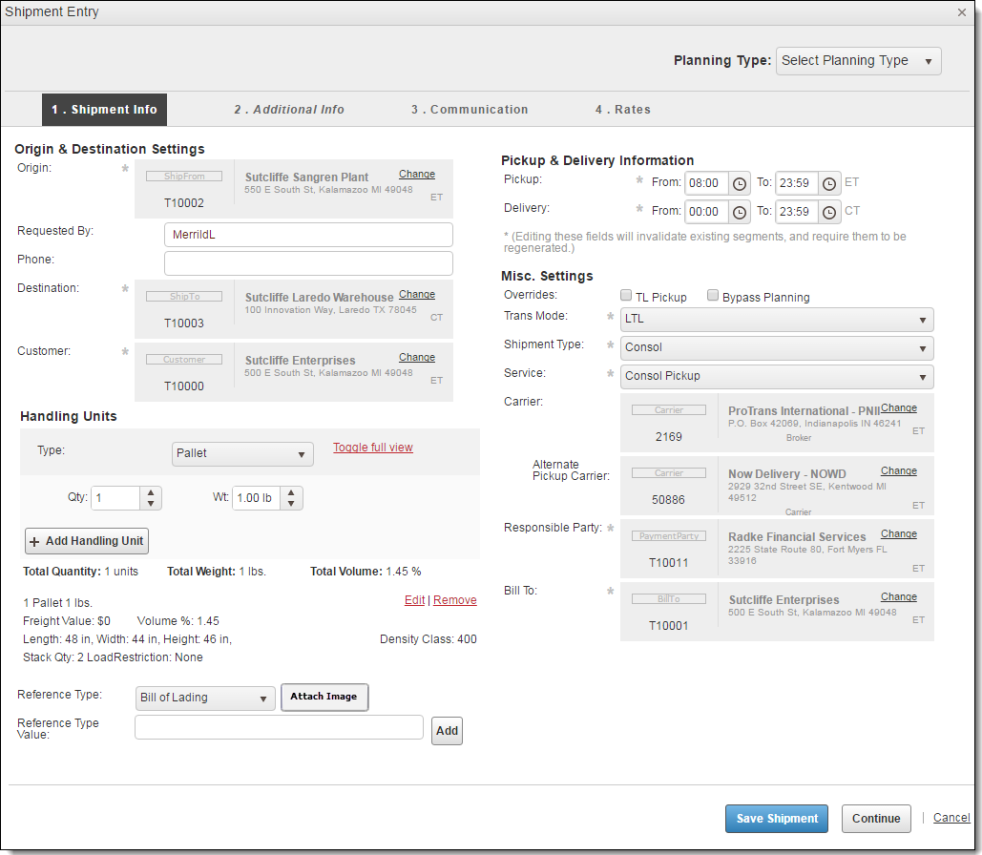
- Click Edit next to the shipment you wish to change. The Add / Edit Shipment dialog box opens:

I would like to...
After Performing Steps 1-5, above:
- Click Pickup Information on the left side of the Add / Edit Shipment dialog box.
- Use the Pickup From, Pickup To, Delivery From, and Delivery To date and time pickers to specify when the freight should be picked up and delivered. Transit times are subject to review by ProTrans and may be changed. You will be notified of any changes to your request by email if you have configured email notifications Configure Email Notifications
After Performing Steps 1-5, above:
- Click Pickup Information on the left side of the Add / Edit Shipment dialog box.
- Type a description of the handling unit for this shipment in the Product Description field.
- If you know the NMFC code for the handling unit for this shipment, type it in the NMFC Code field.
- Select the appropriate NMFC class from the NMFC Class dropdown.
- The Density Class area is a label; its data cannot be changed.
- Type the estimated value of the handling unit for this shipment in the Freight Value field.
- Specify how many levels are allowed to be stacked on the handling unit for this shipment in the Stack Quantity field. A value of 1 indicates that the handling unit should not be stacked on other freight, nor should other freight be stacked on the handling unit.
- Select the type of handling unit for this shipment from the Type dropdown list.
- Type the length in inches of the handling unit in the L field.
- Type the width in inches of the handling unit in the W field.
- Type the height in inches of the handling unit in the H field.
- Type the quantity of handling units containing the specifications entered from steps a-j in the Qty field.
- Type the total weight in US Pounds of the handling units for this group in the Wt field. For example, if you had 1 pallet weighing 500 pounds, type 500. If you have 5 pallets weighing 500 pounds each, type 2500.
- Click Add Handling Unit. Repeat steps a-m to request additional handling units that should go on this shipment.
The handling unit is added and will be noted in your request.
After Performing Steps 1-5, above:
- Click Edit next to the handling unit to be edited.
- Perform steps a-m in the Request to add additional handling units section.
- Repeat steps a-b in this section for other handling units to be edited.
The handling unit is edited and will be noted in your request.
After Performing Steps 1-5, above:
- Click Remove next to the handling unit(s) to be removed.
The handling unit is removed and will be noted in your request.
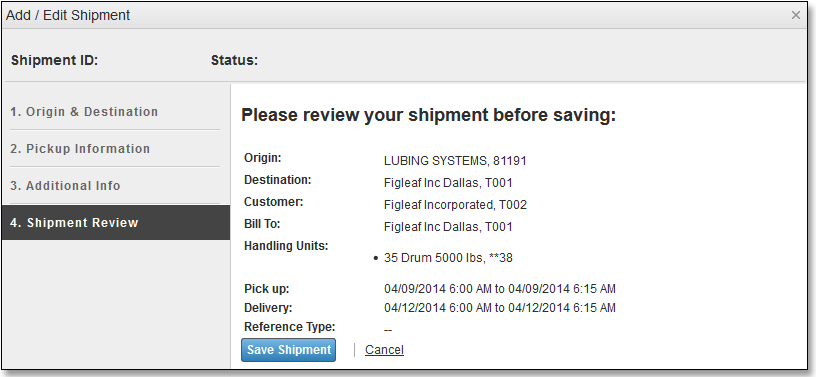
- After reviewing the information in the Add / Edit Shipment dialog box, click Continue until you reach the Shipment Review step:

- When you reach the Shipment Review step, review the data and click Save Shipment.
- Repeat steps 1-7 for additional shipments on this load for which you are requesting changes.
- Click Submit Request.
Customer Portal displays a dialog box with a Request ID, confirming the request was submitted.
