Overview
The notifications settings in Customer Portal enable you to configure email notifications for various locations and actions:
- A new shipment has been scheduled.
- A submitted request was approved.
- A submitted request was revised.
- A submitted request was rejected.
- A submitted request was cancelled.
Every Customer Portal user has an associated email address. That email address is used when email notifications are sent.
Process
To Configure Email Notifications:
- Place your cursor over the gear near the upper right corner of Customer Portal.
- Click My Optimiz.
The My Optimiz page opens.
- Click Notifications.
The Notifications Options page opens:
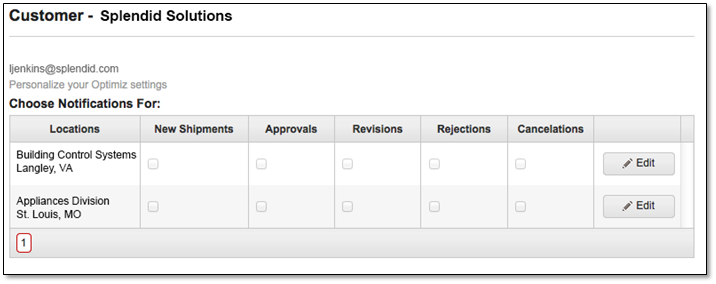
- Click Edit in the row containing the location whose notifications you wish to configure.
- Select or deselect the check boxes corresponding to the alerts you wish to receive or stop receiving.
- Click Update. Repeat steps 4-6 for additional locations.
The settings immediately take effect.
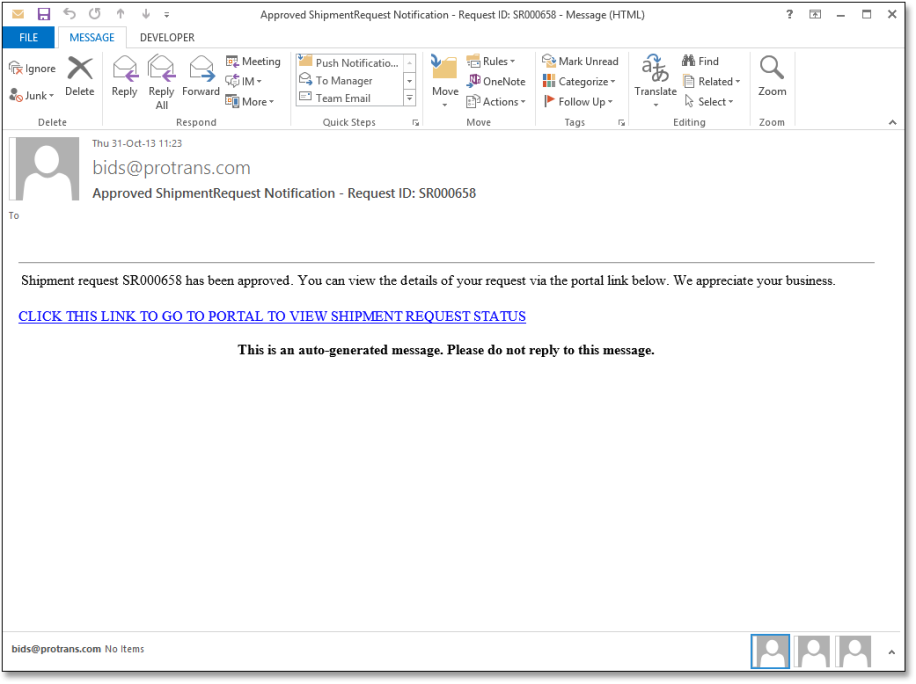
What Do the Email Notifications Look Like?
Email notifications arrive in your in-box as soon as an event occurs. The email notification contains the Shipment Request ID, along with the occurring event. The illustration below depicts a notification for an approved shipment request: