Add Shipments to an SAF
Overview
When should I add shipments to an SAF?
You should add shipments to an SAF when the SAF was initially created without shipments, but the charges need to apply to actual movements. You should also add additional shipments to an existing SAF when the SAF is intended to cover a full truckload or other multi-shipment movement.
Prerequisites
Before you can add shipments to an SAF:
- The SAF must already have been created.
Process
To Add a Shipment to an SAF:
- Search for and open the SAF that needs shipments. See Search for an SAF for details.
- Enter the shipment ID in the Associate to Shipment ID field.
- Select the shipment ID from the dropdown that appears.
- Click Associate.
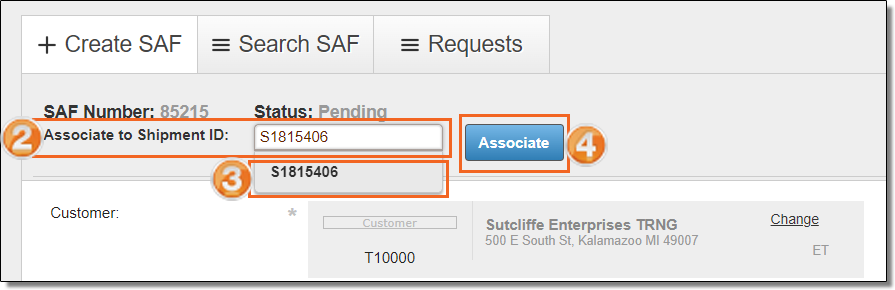
A message appears. If the shipment does not belong to the customer on the SAF, it states that the shipment cannot be assigned to the SAF. If the customers match, it asks to confirm the association.
To Add Multiple Shipments to an SAF:
- Search for and open an SAF that already has one or more shipments assigned to it. See Search for an SAF for details.
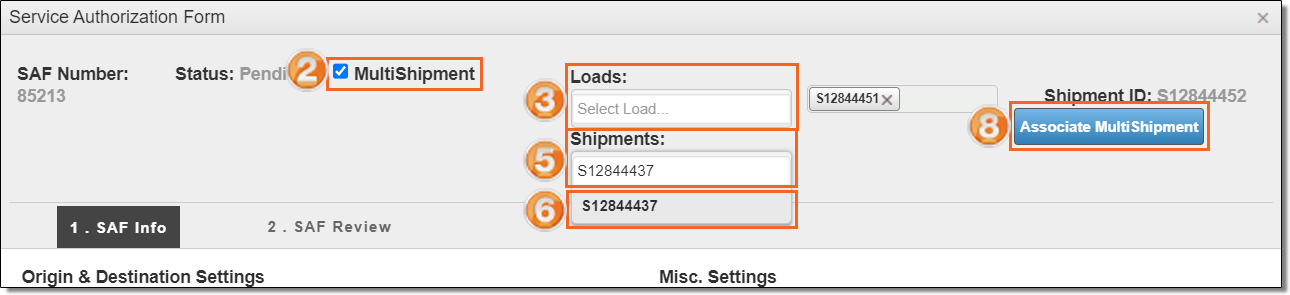
- Select the MultiShipment check box.
- Enter a load ID in the Loads field to associate all shipments on a load to the SAF, if needed.
- Select the load ID from the dropdown list that appears, if needed.
- Enter a shipment ID in the Shipments field to associate a shipment to the SAF, if needed.
- Select the shipment ID from the dropdown list that appears, if needed.
- Repeat steps 3 - 6 as needed until all loads and shipments to add to the SAF have been selected.
- Click Associate MultiShipment.
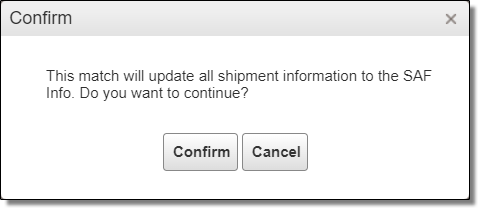
A message appears. If the shipments or loads do not belong to the customer on the SAF, it states that the shipments cannot be assigned to the SAF. If the customers match, it asks to confirm the association.
- Click Confirm to associate the shipment to the SAF or Cancel to cancel the association.
Result
The selected shipment(s) are associated with the SAF, and all SAF charges are allocated to the shipment(s). Any existing invoices are updated with the new shipment information.
Now that you know more about adding shipments to an SAF, you may want to read more about: