Create a New Customer
Overview
All customers must be entered in Optimiz before processes that depend on them can be completed. For example, an unplanned load cannot be completely built until the customer associated with the load has been entered. Creating a new customer may also be referred to as adding a customer.
Example:
The customer is the foundation of the Optimiz database. Once a customer is created, the Bill To, Ship To, and Ship From entities pertaining to it can be created and associated with the customer.
When Should I Create a New Customer?
The start-up team creates a new customer when the customer signs a contract with ProTrans.
Process
DO NOT PROCEED unless you are authorized to create new customers in Optimiz.
Prior to creating a new customer, conduct a customer search to ensure that the customer does not already exist. Do not create duplicates. Duplicate or erroneous entries will result in poor performance and quality issues within the system.
To Create a New Customer
- Hover the cursor over Entity in the menu at the top of the page.
- Click Customer Search.

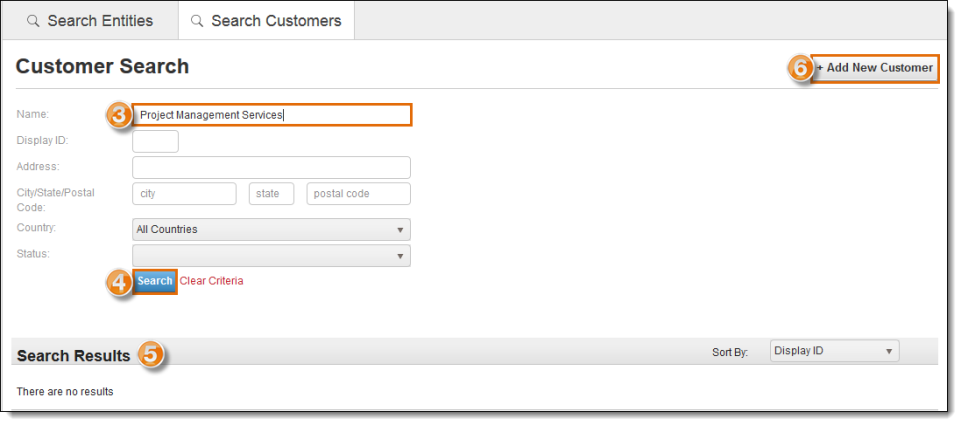
- Enter the Customer's name.
- Click Search.
- If the customer already exists, the results will be displayed in the results grid at the bottom of the screen.
- Click +Add New Customer at the top right of the page.

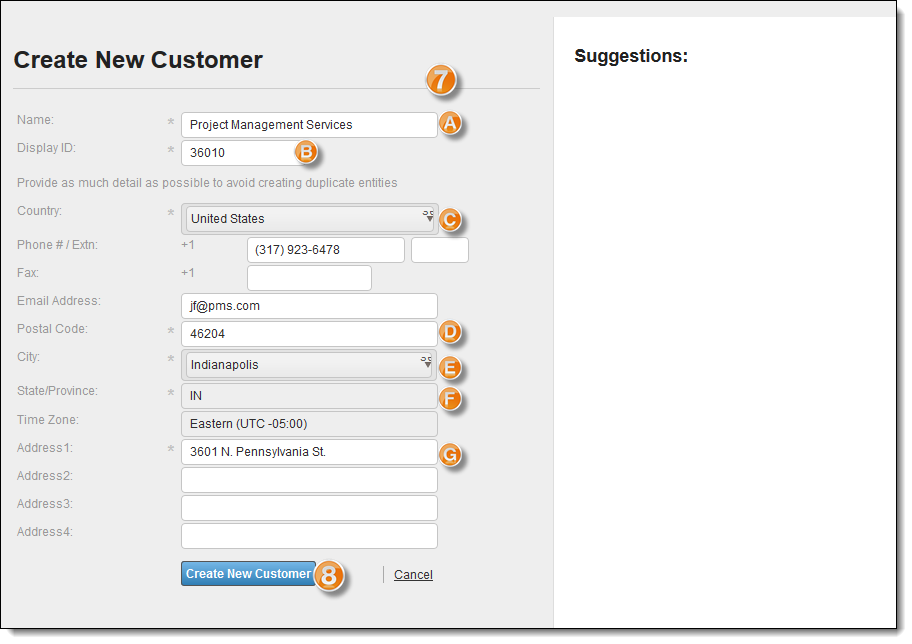
- Enter the information for the customer – at a minimum the following:
- Name
- Display ID
- Country
- Postal code
- City (will auto-fill after postal code is entered)
- State (will auto-fill after postal code is entered)
- Street address.
- Click Create New Customer.

The new customer has been created and is opened in the Customer Hierarchy view.

Result
The Customer is added to Optimiz. This creates the customer hierarchy page.
Next Steps
- Create the entities that will be associated with the new customer.
- Link the entities to the customer in the customer hierarchy.