Create a New Shipment
Overview
Suppliers can create and submit live shipments or shipment requests using the Create Order screen. The user credentials will determine whether or not approval is required for submitted shipments. Users will know whether their shipment was requested or automatically approved based on the confirmation notification that shows after clicking Save Shipment, which is explained further at the end of this page. When entering a shipment or shipment request, all required fields will be highlighted in red.
Prerequisites
Before you can create a new shipment, you must:
Process
To Create and Submit a Shipment:
- Click Create Order from the side panel in PTConnect, or click Create New from the top of the grid.

The Create New Order window opens.
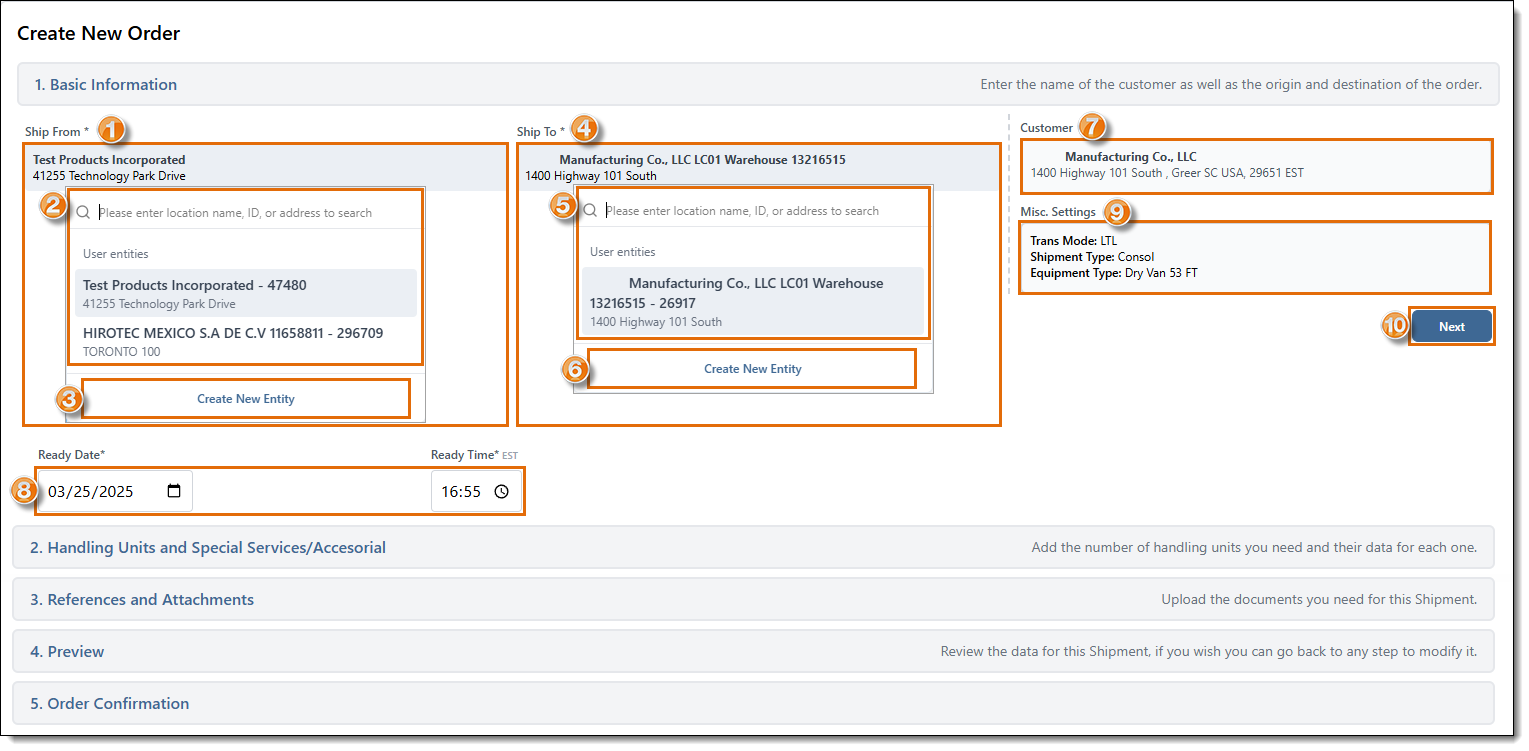
Basic Information
The origin and destination, or O/D Pair, of the shipment describe where the shipment is coming from and where it is going. If the O/D Pair has been set up properly in the Customer Hierarchy, all the other information in this section will be completed automatically. If the origin or destination do not appear when searching, contact ProTrans.
- Click the box under Ship From.
- Select the Ship From from the list, or use the search to find the origin needed.
- If you are unable to find the origin entity needed, click Create New Entity. See Create a New Entity for details.
- Click the box under Ship To.
- Select the Ship To from the list, or use the search to find the destination needed.
- If you are unable to find the destination entity needed, click Create New Entity. See Create a New Entity for details.
- Search for and select the Customer, if needed. Optimiz will automatically fill this field if a relationship already exists between the Origin and Destination in the Customer Hierarchy.
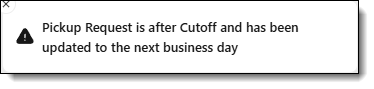
- Select the Ready Date and Ready Time of the shipment. This is the window during which the shipment can be picked up. The date will default to the current date, and the time will default to 2 hours after the time you are creating the shipment, unless it is past noon ET, in which case, a message will appear indicating the pickup date will roll over to the next day. PTConnect will automatically calculate the transit time from pickup to delivery.
- Review the Trans Mode, Shipment Type, and Equipment Type required for the shipment in the Misc. Settings section.
- Click Next to continue.
Click Cancel in the top right of the Create New Order window at any point during order entry to clear all the data entered and close the Create New Order window.
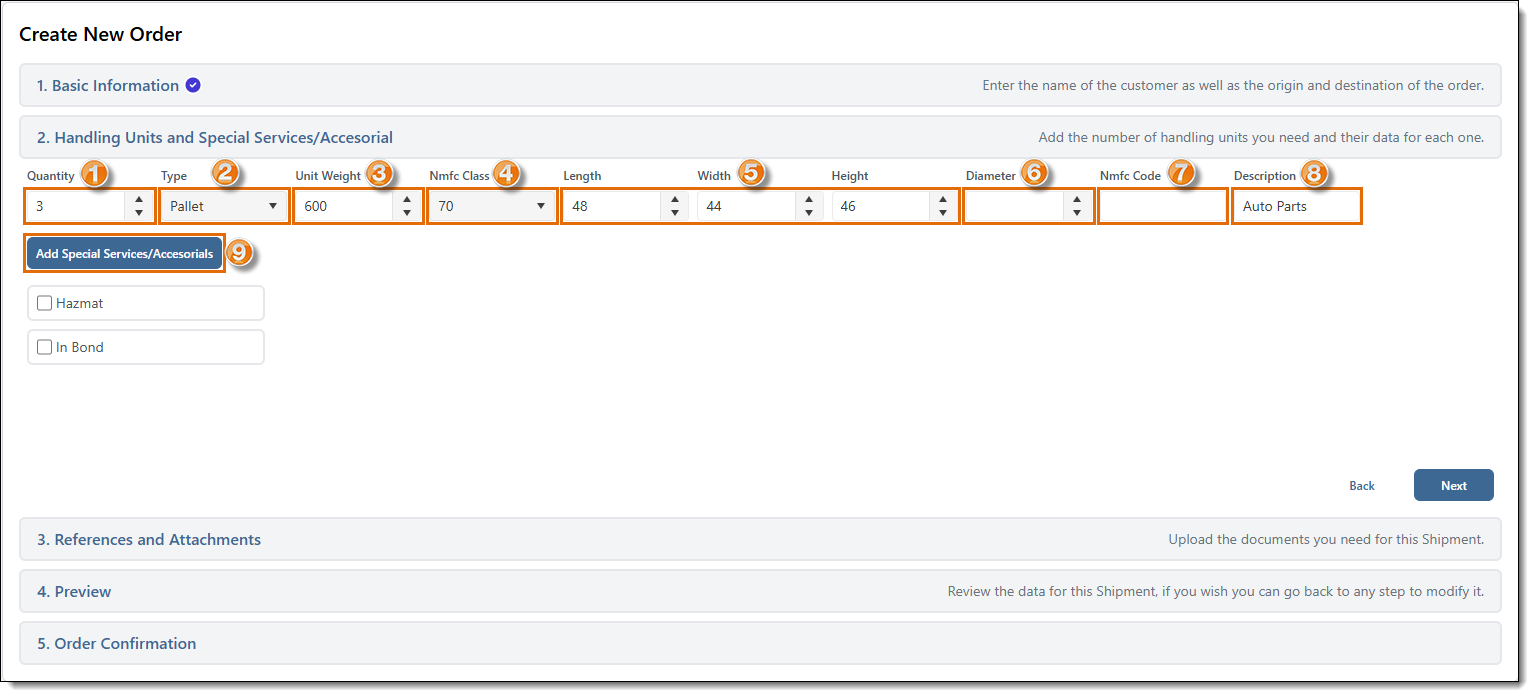
Handling Units & Special Services/Accessorials
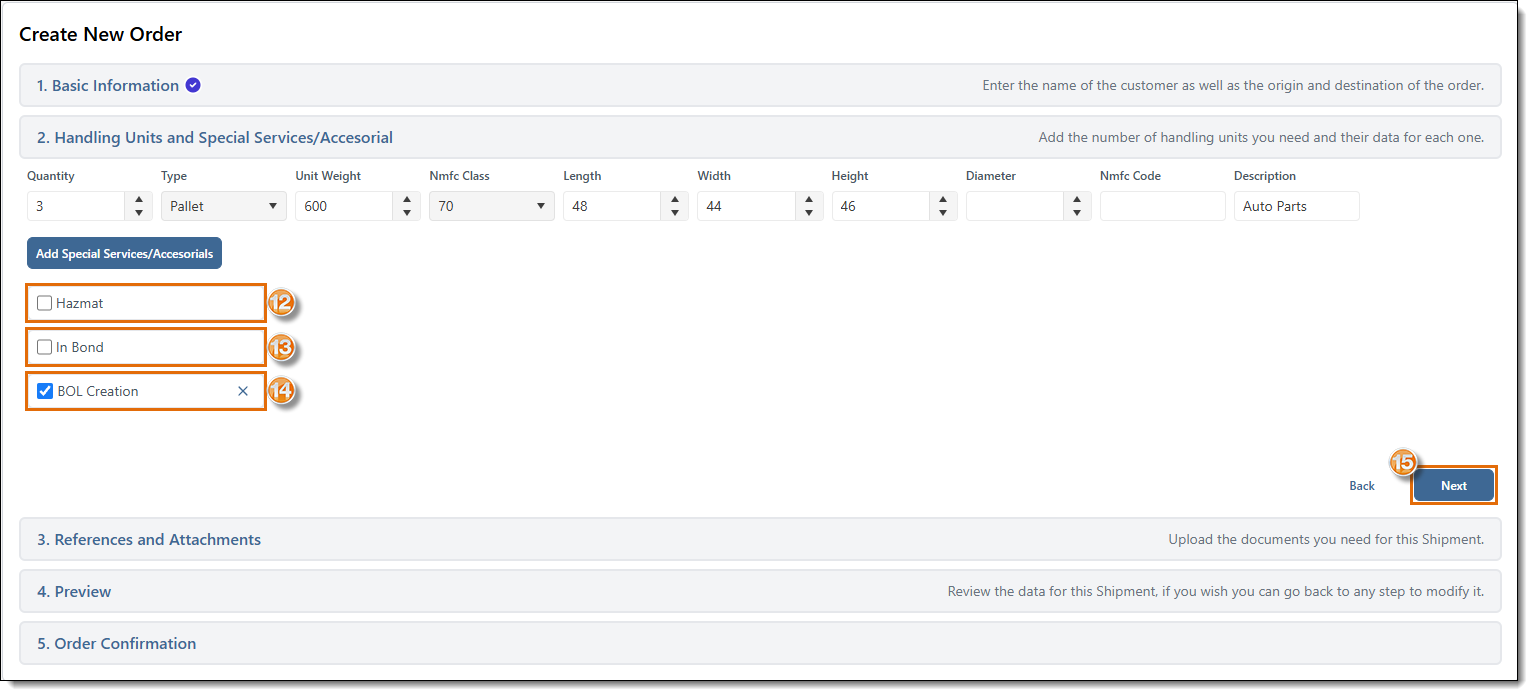
The handling units of a shipment describe what is physically being moved. Handling unit information is important to properly plan trailer utilization and to accurately bill the customer. If default shipment items are defined in the Customer Hierarchy for the selected O/D Pair, these fields will fill automatically.
- Enter the Quantity, which is how many handling units of this type are being shipped.
- Select the Type of handling unit, such as Pallet or Carton.
- Enter the Unit Weight, which is the total weight of all handling units of this type being shipped.
- Select the NMFC Class.
- Edit the Length, Width, and Height.
- Enter the Diameter, if applicable.
- Enter the NMFC Code.
- Enter the Description of the freight.
- If the shipment requires any special services or accessorials, click Add Special Services/Accessorials that apply to the shipment.
- A pop-up will open. Select the Special Services or Accessorials that apply to the shipment.
- After making your selections, click to the side of the pop-up to close it.
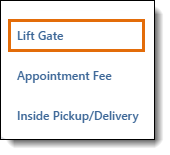
- If entering Hazmat information, select Hazmat, and see Add Hazmat Information.
- If entering In-Bond information, select In-Bond and see Add In-Bond Information.
- To remove a Special Service or Accessorial you previously selected, click the X or uncheck the box next to it.
- Click Next to continue.
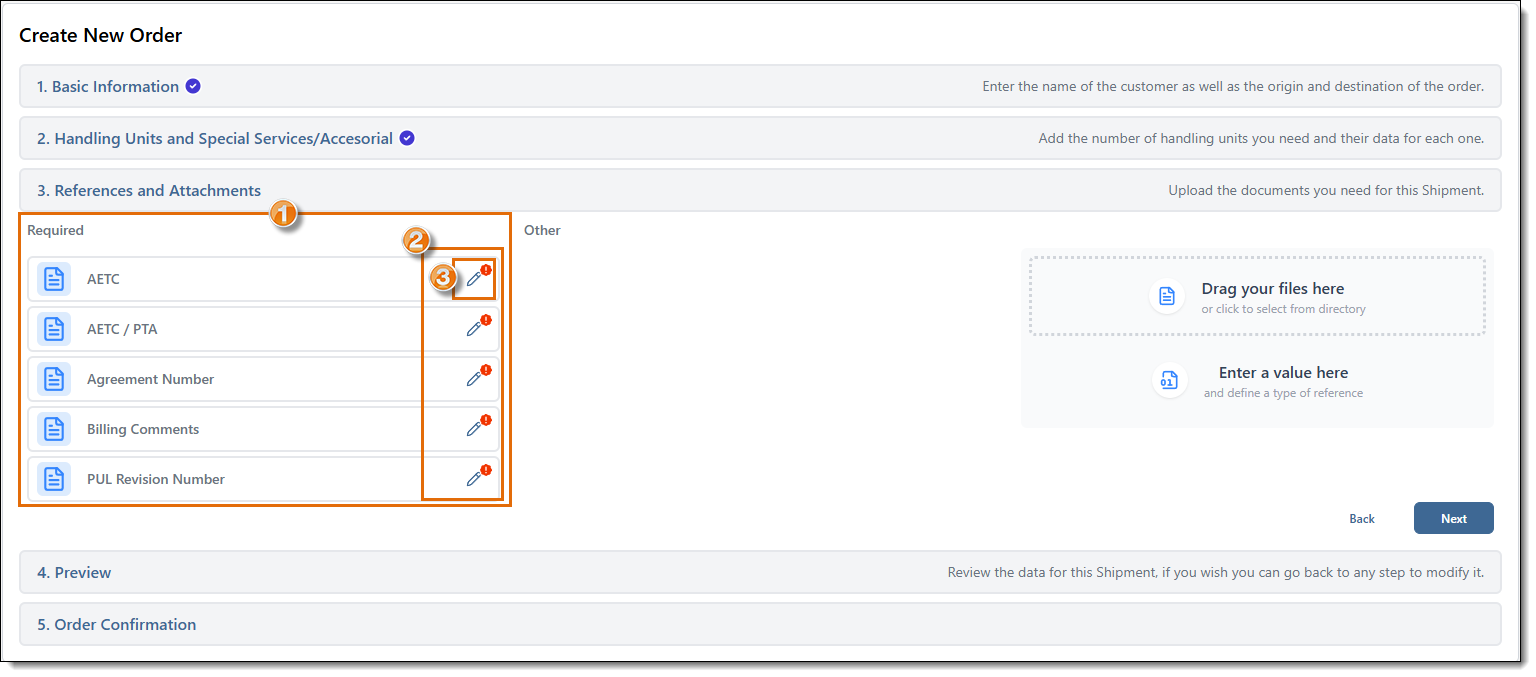
Add New References and Attachments
The next section contains references and attachments. References can include a pickup number, plant number, a Bill of Lading number, or another reference depending on customer requirements. The maximum individual file size is 4.0 MB.
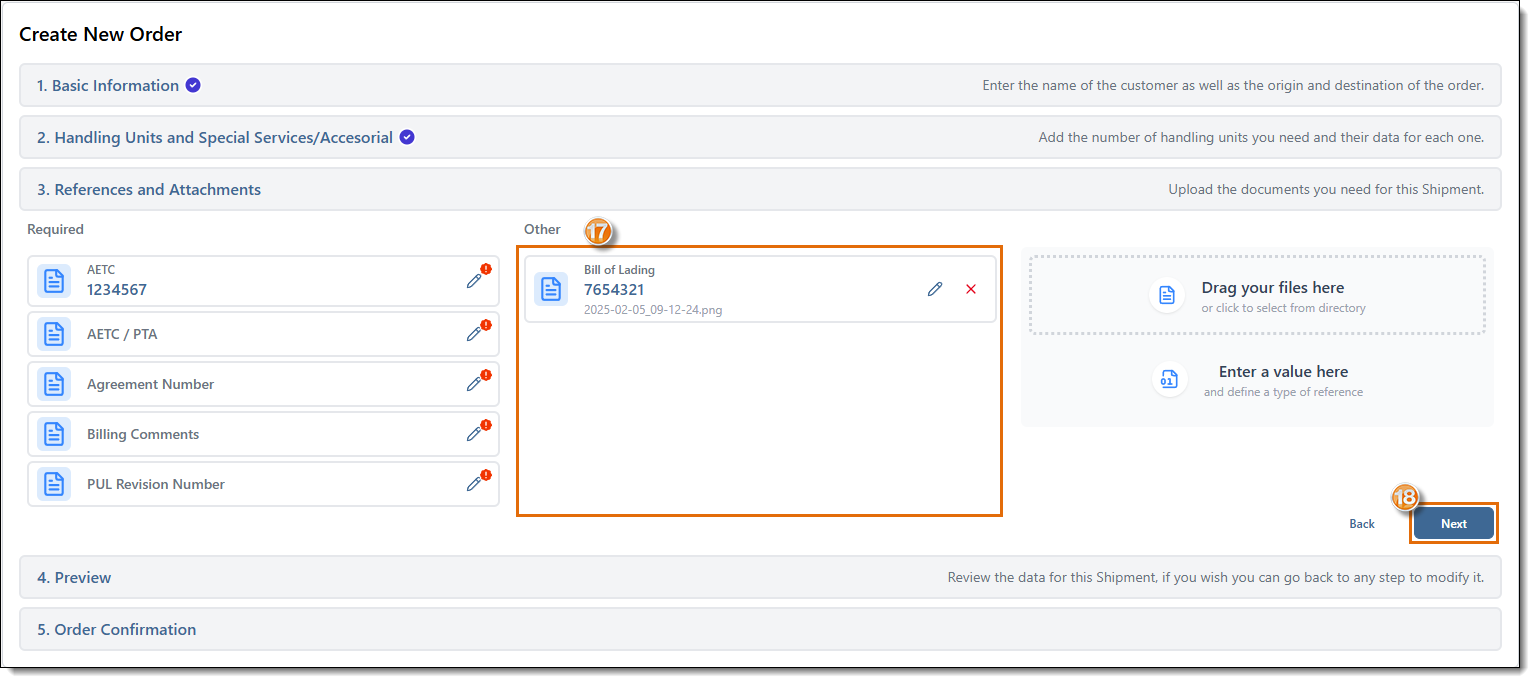
- References that are required will show in the Required section.
- If a required reference is missing, an ! icon will display next to it.
- To add or edit a required reference, click the Pencil icon.
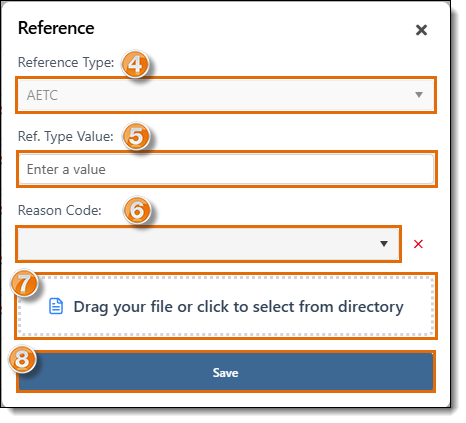
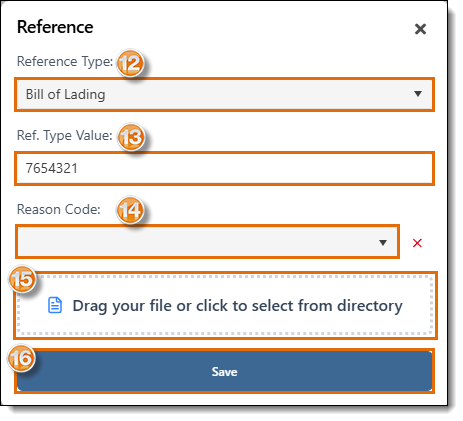
- A pop-up will open. The selected reference type will display under Reference Type.
- Enter the Reference Type Value that matches the reference type required. (e.g. BOL Number, AETC Number, etc.)
- Select a Reason Code if needed.
- If the reference has a document related to it, you can drag the file to the window, or click the File icon to upload it from your computer.
- Click Save to save the reference and close the pop-up window.
- Additional references that are not listed as Required, but are added to the shipment will display in the Other section.
- To upload a document to the Other section of the shipment references, you can drag the file to the window, or click the File icon to upload it from your computer. The maximum file size is 4.0 MB.
- To add another reference that is not listed as Required, click the Number File icon.
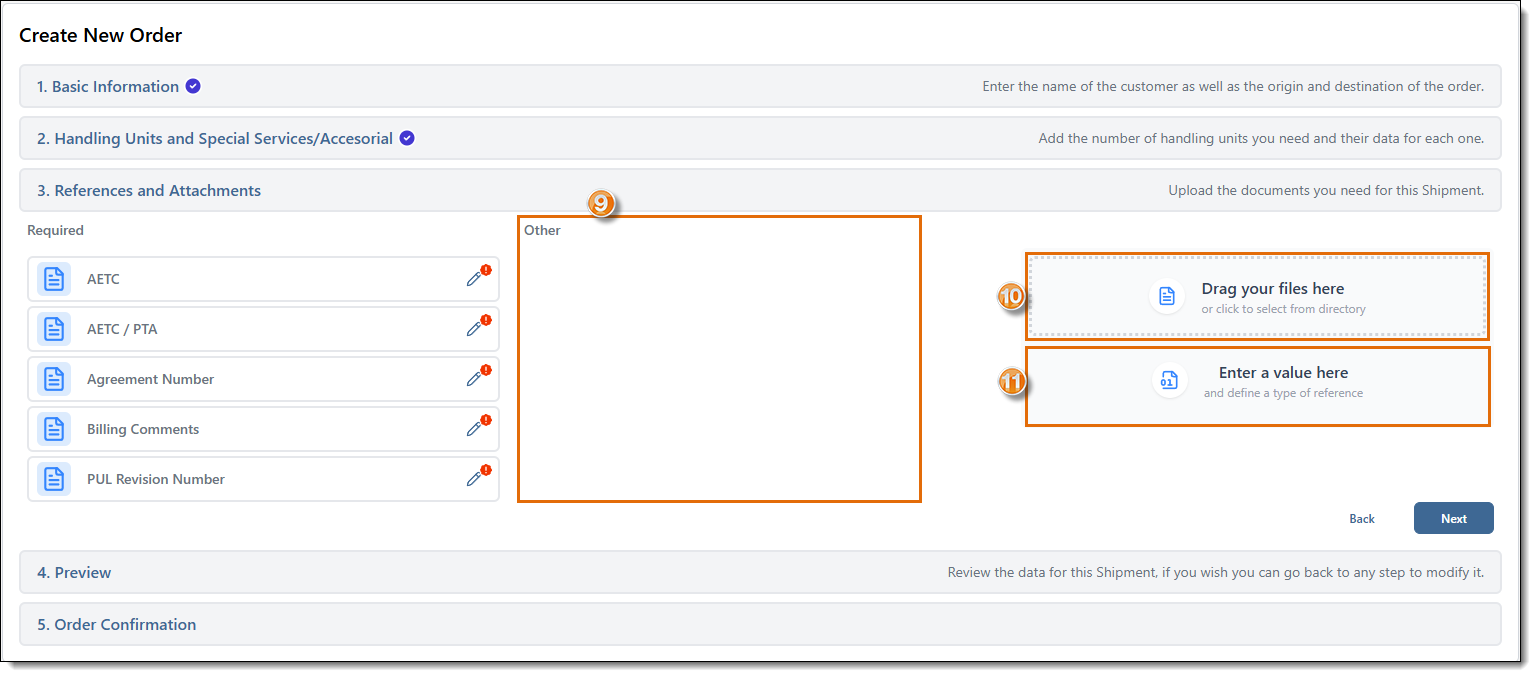
- A pop-up will open. Select the type of reference you want to upload under Reference Type.
- Enter the Reference Type Value that matches the reference type you selected. (e.g. BOL Number, AETC Number, etc.)
- Select a Reason Code if needed.
- If the reference has a document related to it, you can drag the file to the window, or click the File icon to upload it from your computer.
- Click Save to save the reference and close the pop-up window.
- The reference(s) added will display under Other.
- Click Next to continue.
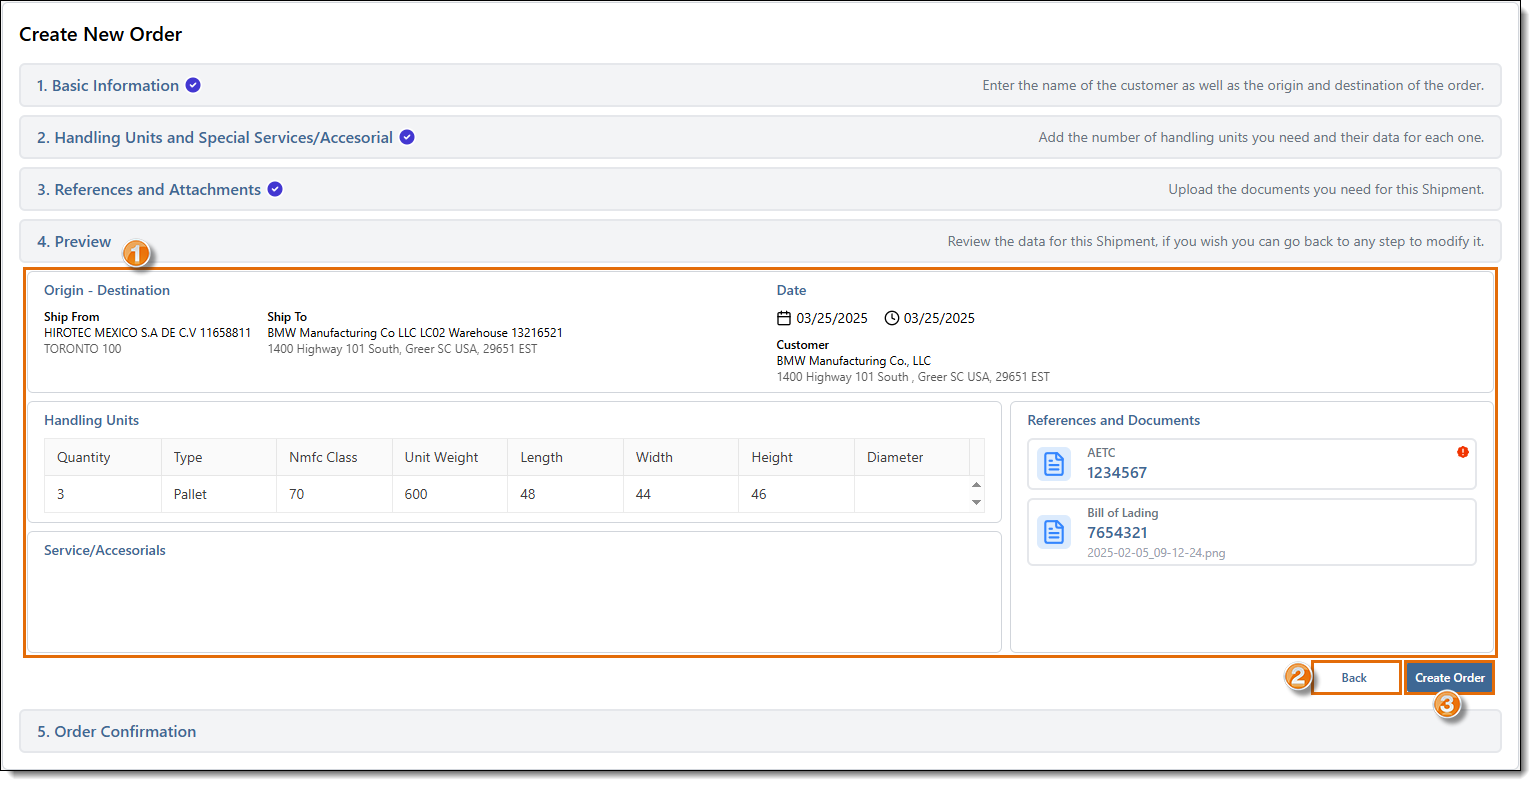
Preview
- The Preview section displays a summary of all the shipment information entered. If you need to edit any of the information, click Back to return to the previous screens.
- After you have reviewed the shipment information entered, and are ready to submit your order, click Create Order.
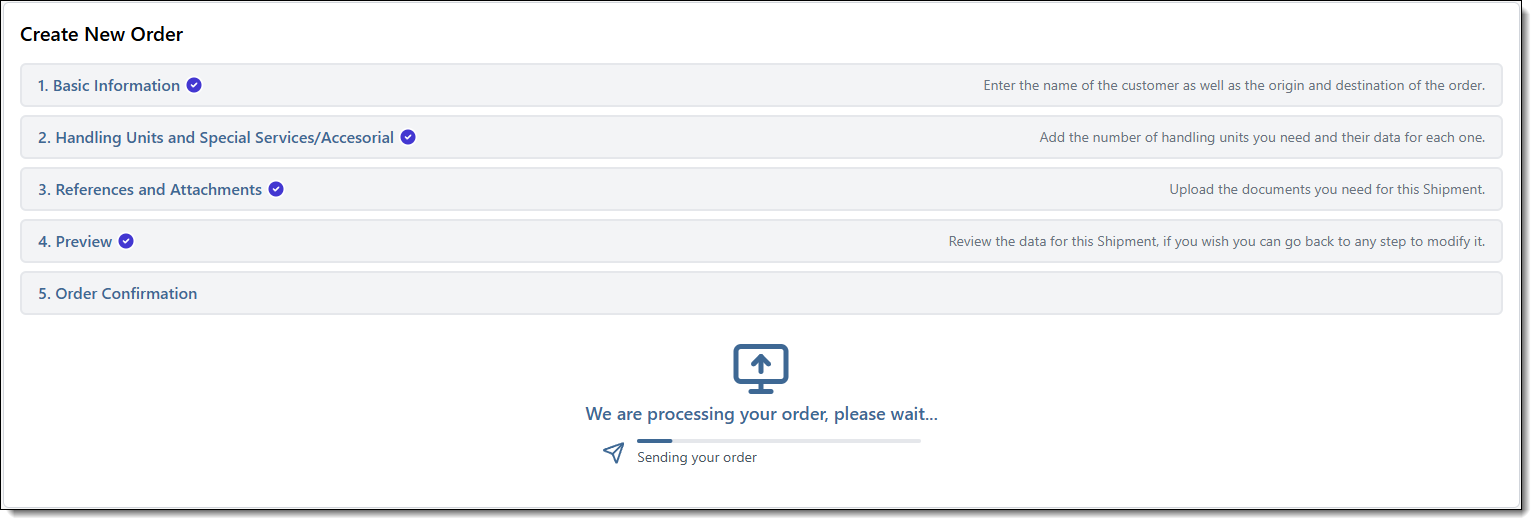
A message will appear indicating the order is processing.
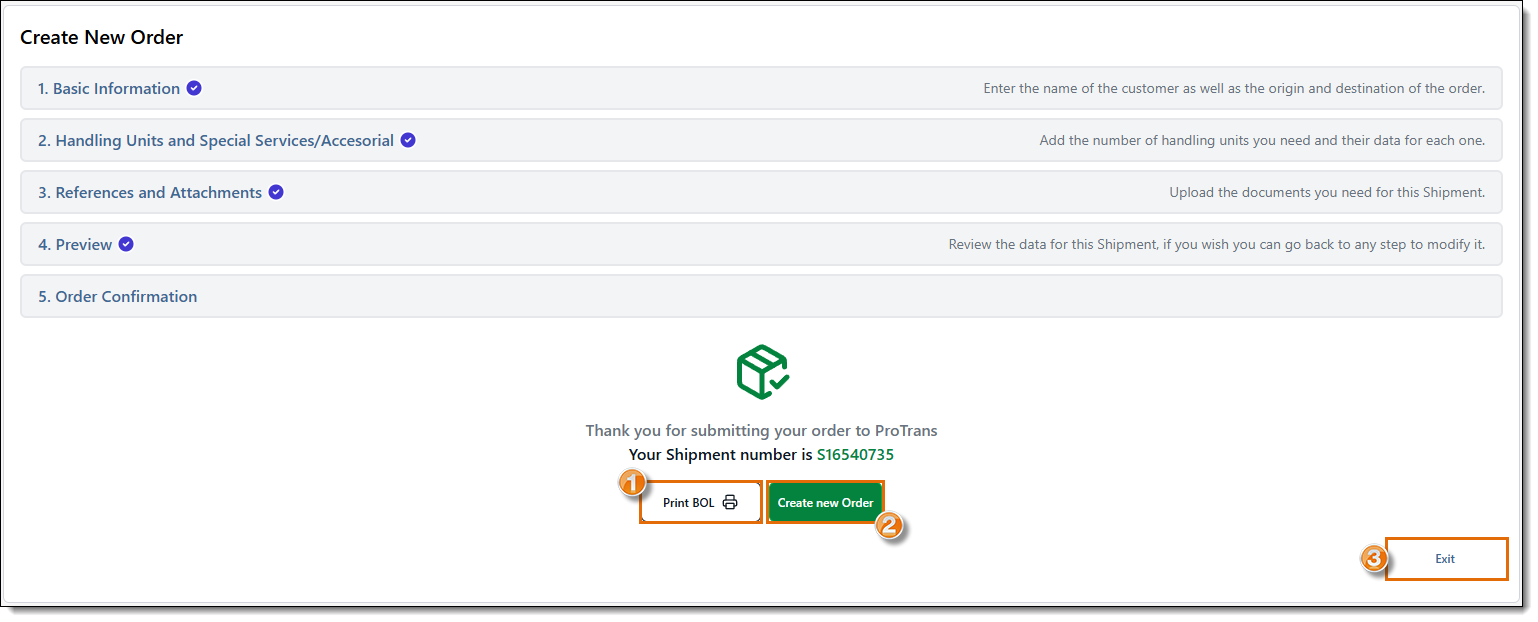
After the order finishes processing, a confirmation message will appear with the Shipment Request (SR) ID or Optimiz Shipment Number, depending on if your account is set up to create Shipments or create Shipment Requests. Keep the Shipment Number for tracking and follow-up purposes.
- To print a copy of the BOL, click Print BOL. (This option is not available for Shipment Requests (SRs), only for scheduled Shipments, as an SR requires approval by ProTrans before it can be scheduled.)
- To create a new order, click Create New Order.
- To close the Create New Order screen and return to the main Tracking screen, click Exit.
Result
The shipment or shipment request is saved and ready for processing by a ProTrans employee. If no review is required, the shipment is scheduled for pickup.
Related Topics
Now that you know more about creating a new shipment, you may want to read more about: