Add an In-bond Document to a Shipment
Overview
Prerequisites
Before you can add an In-bond document to a shipment, you must access the Missing Documents tile. See Access Missing Documents.
Process
To add an In-bond document to a Shipment:
- Search for the shipment to be updated, if needed. See Search for a Shipment with Missing Documents.
- Select the image from the images available in the system that matches the shipment that is missing the document. Multiple images can be selected by holding the Ctrl key on your keyboard and clicking on additional images.
- Click the Shipment Number.
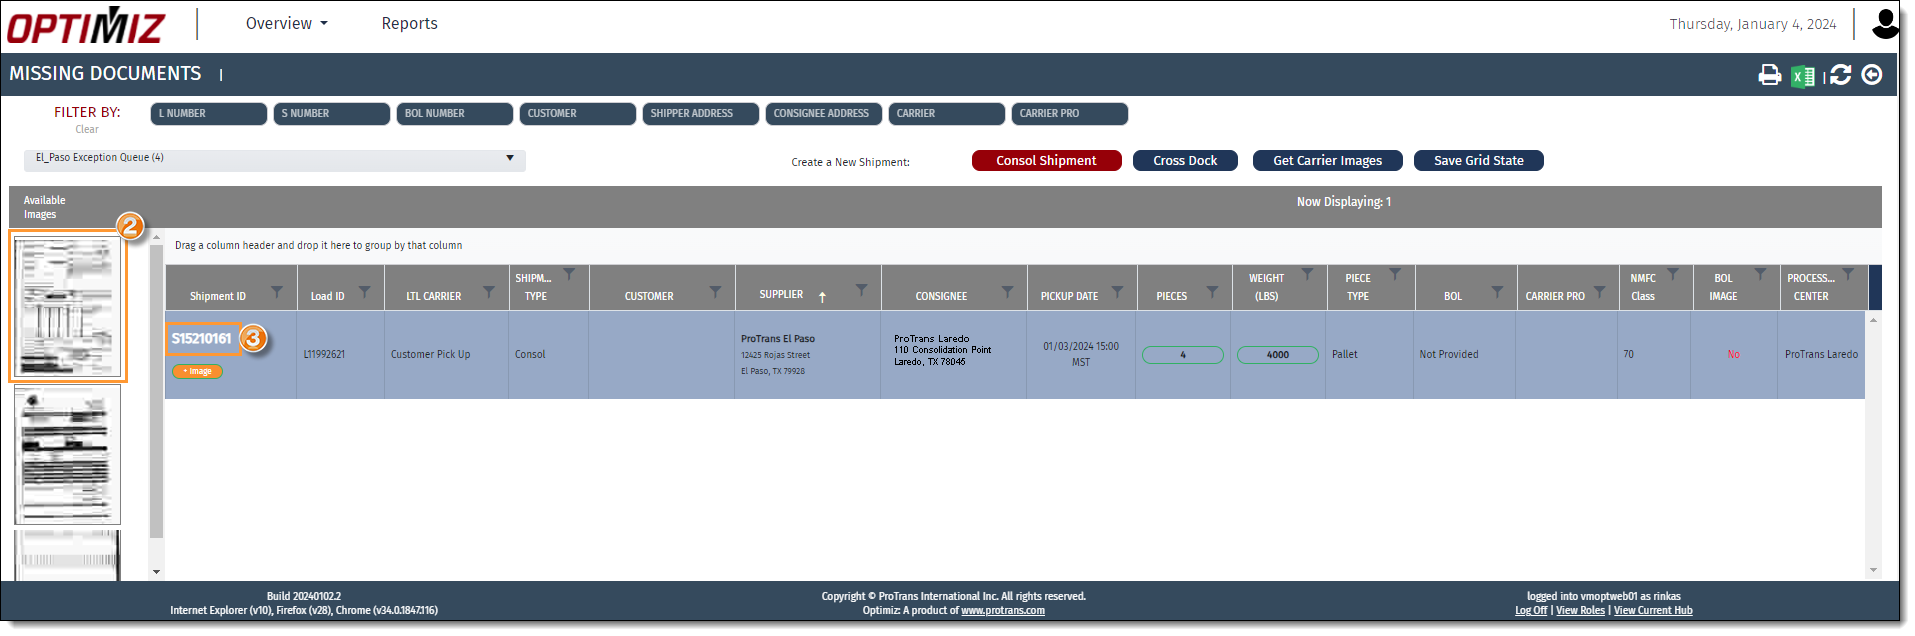
The Check In page opens.
- Review the information displayed on the image, and compare it to the information entered in Optimiz. Verify the Supplier, Consignee, pieces, weight, piece type, In-bond number, BOL number, and carrier pro match.
- Make sure In Bond is checked.
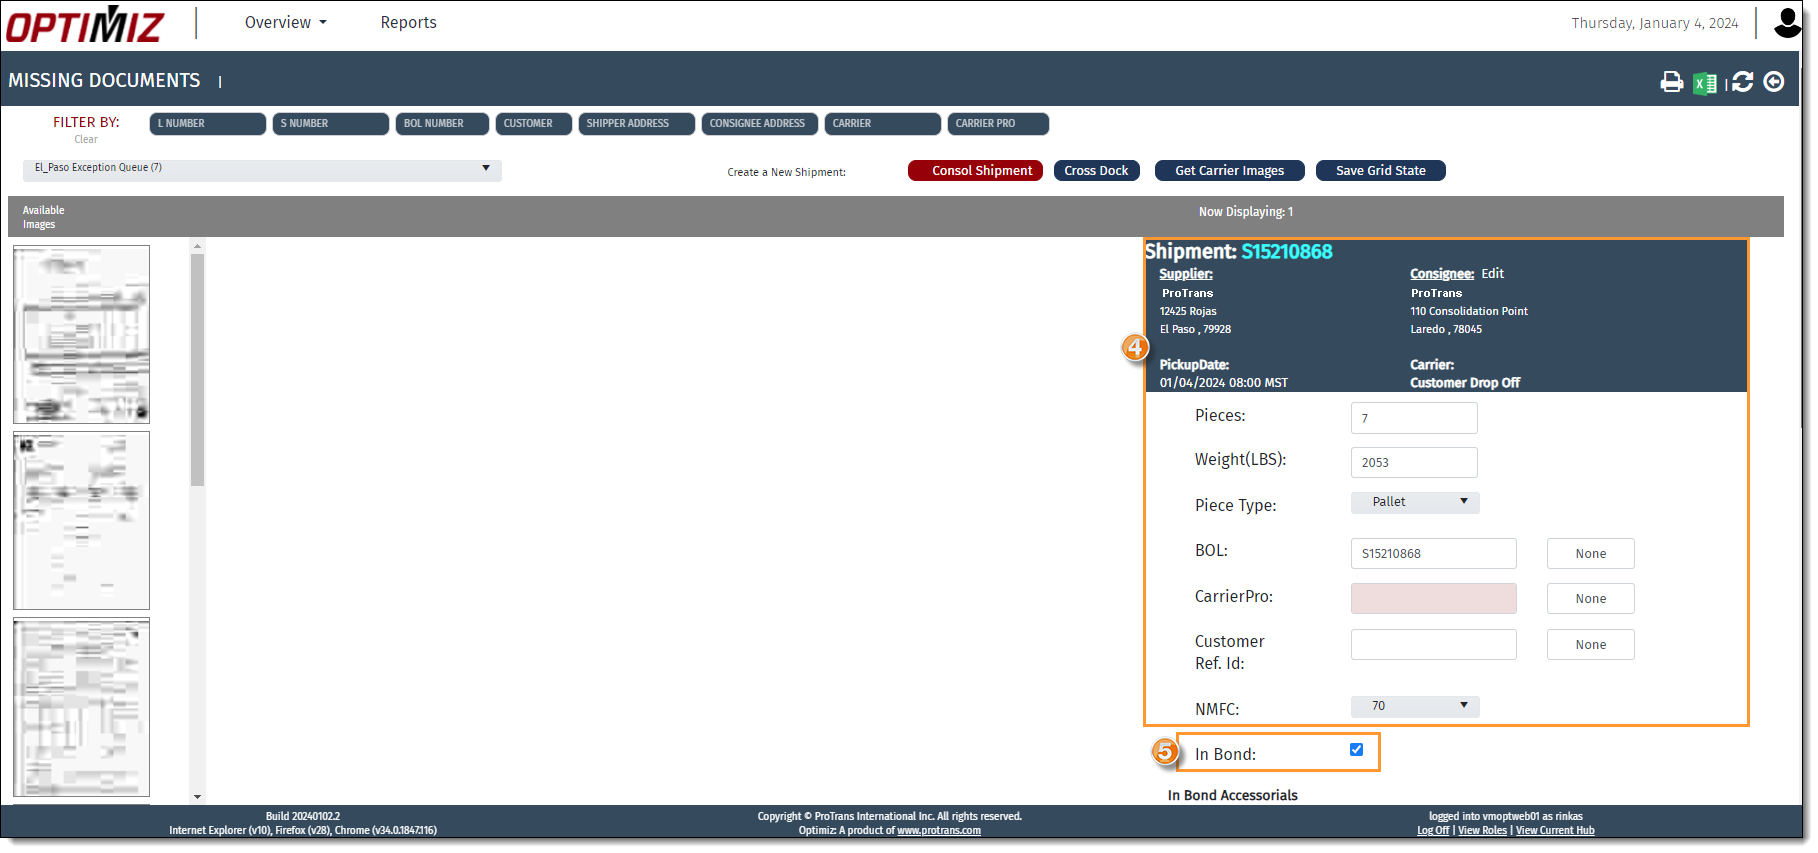
- Scroll down to the In Bond Accessorials section.
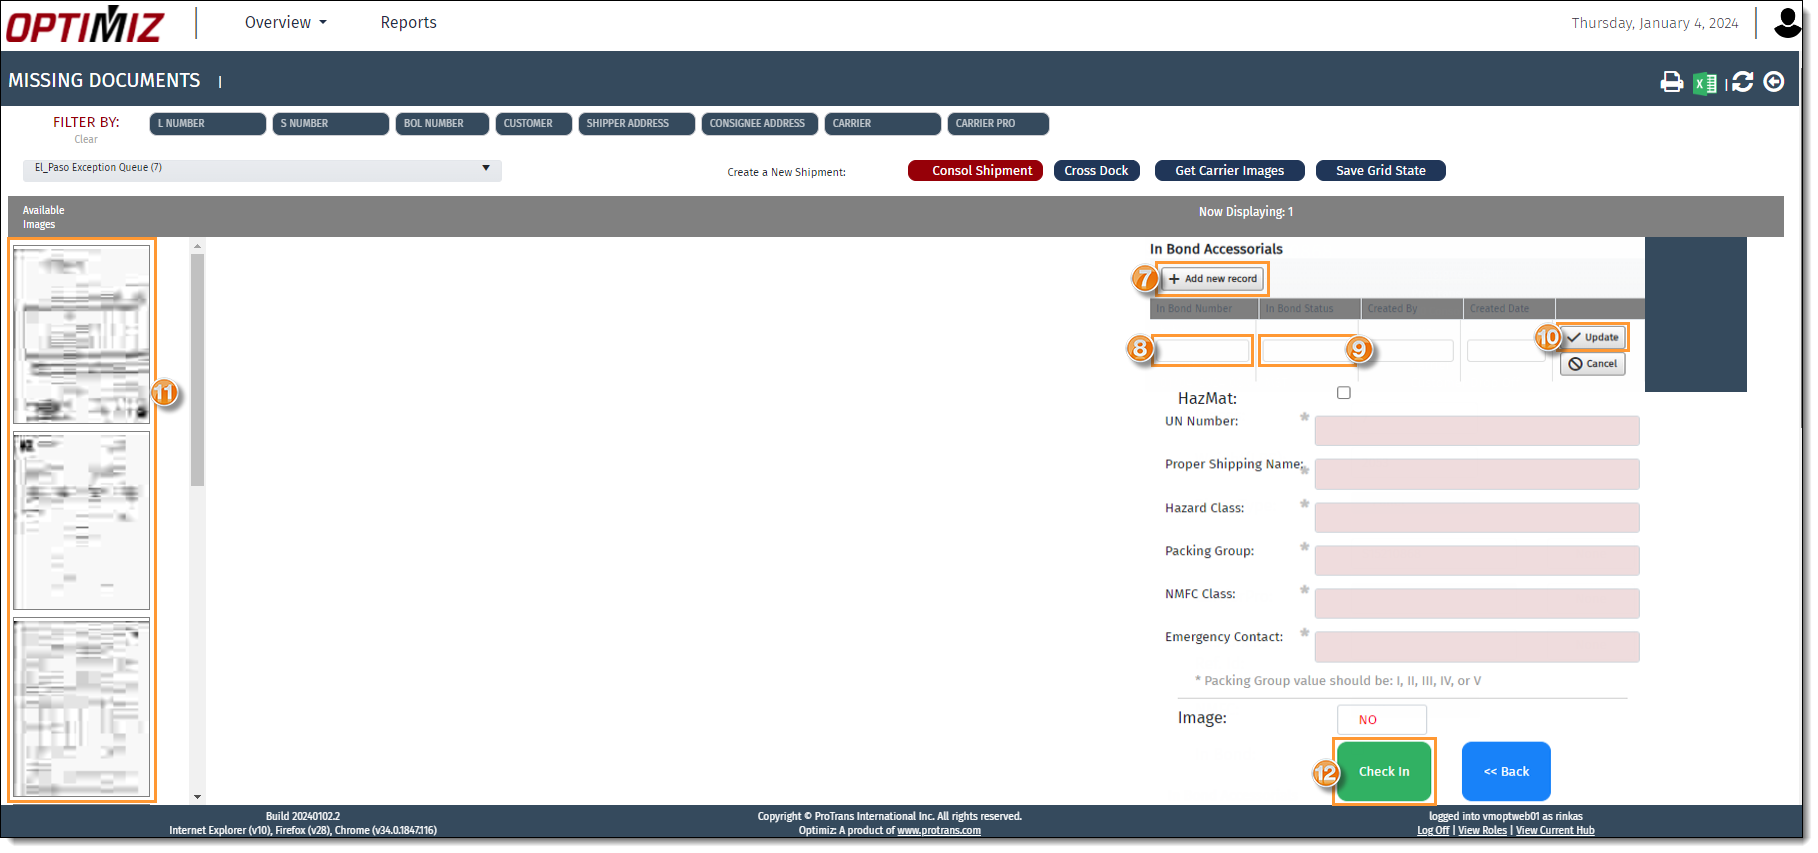
- Click Add New Record if the In-bond number is missing.
- Enter the In-bond number in the In Bond Number field.
- Enter the In-bond status in the In Bond Status field.
- Click Update to save the In-bond number.
- Select the required In-bond images again from the queue if needed.
- Click Check In to assign the selected In-bond documents to the shipment in Optimiz .
Result
The In-bond documents have been added to the shipment.