Save a Logistics Plan
Overview
When finished entering the shipments, segments, and details for a logistics plan, carefully review the information in all sections and save it.
Be sure you review ALL of your entries BEFORE saving, to avoid issues with the plan and auto-generated loads later.
Process
To Save A Logistics Plan:
- Add all of the required information for the logistics plan. See Create a Logistics Plan
- Review all information in the plan for accuracy. Make corrections, if necessary.
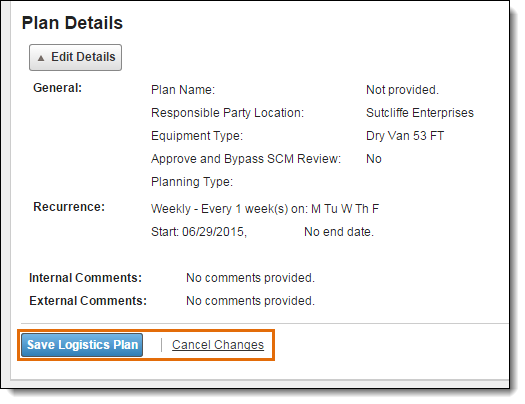
- Click Save Logistics Plan near the bottom of the Logistics Plan Entry page, or click Cancel Changes to discard.
Load Statuses After Saving a Logistics Plan
The status that is applied to a load after it is saved depends on the role of the user and auto-approval settings. Review the table below:
| Element | Description |
|---|---|
| Ready To Tender | This status is applied to loads that are set for auto-approval (Auto Approve checkbox is selected on the General tab in the Edit Load Details dialog box). This status may immediately be changed to Tendered, if the load is within 24 hours of the pickup date and time. |
| Pending | This status is applied to any load that is not set for auto-approval. (Auto Approve checkbox is deselected on the General tab in the Edit Load Details dialog box). |
| Carrier Planning | One time loads that have a Transportation Mode other than LTL or that have no shipments receive this status and are sent to the Carrier Planning Management page. However, if the user has a role of Planning Manager, they can choose to override this status and send the load on for tendering. |
Result
Optimiz notifies you that the plan was saved successfully. The plan is saved and will be tendered according to the recurrences you entered. The plan will generate the first load within 15 minutes if the pickup time is less than 24 hours away, or the day before pickup at 11 A.M. ET.
Related Topics
Perform Engineering Change Request (ECR) Process Tasks - Requests to add, change, or terminate logistics plans