Enter General Details
Overview
Process
To Add General Details:
- Create a one time load or logistics plan. See Access One Time Load Entry or Access Logistics Plan Entry.
- Add Shipment information and manage the segments (See Manage Segments and Stops).
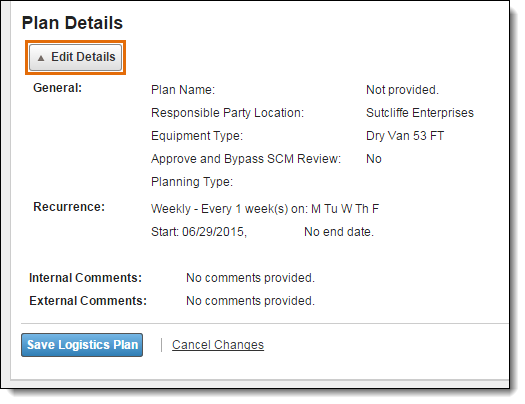
- In the Load or Plan Details section, click Edit Details.

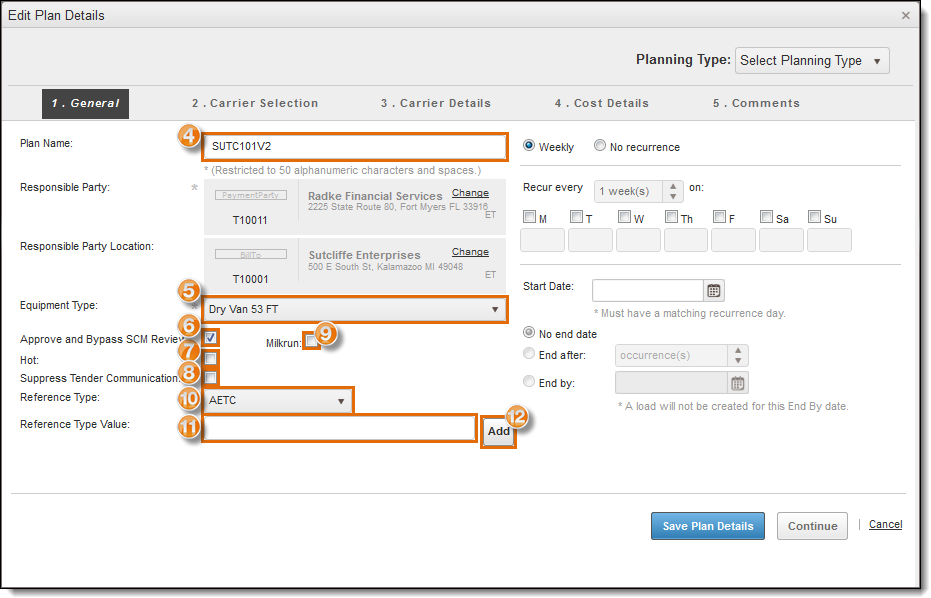
- Type the Plan Name. This is generally the customer's name for the lane or route the plan covers.
- Select the Equipment Type from the drop-down list if needed. This is the type of equipment that will be used to haul loads created from the plan. The equipment type from the shipment is selected by default.
- Select the Approve and Bypass SCM Review check box if this load does not need to be sent to Planning Management for further review by a Supply Chain Manager. This is generally unchecked for logistics plans.
- Select the Hot check box if this plan requires closer monitoring. Note, that this is not the same as Expedite (see Expedite a Load).
- If the intended carrier does not need to be notified with a tender request, select Suppress Tender Communication. If selected, Optimiz will not send tender information to the carrier by email.
- Select if the plan is for a Milkrun. See Manage Segments and Stops for details.
- Click the Reference Type dropdown list to select a specific reference if needed.
- Enter the reference information in Reference Type Value.
- Click Add.

Add Recurrence Details
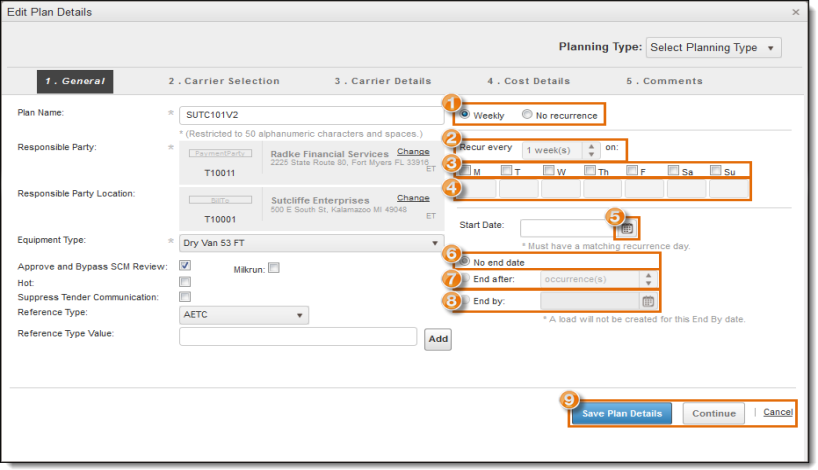
- Select the recurrence using the radio button. Select Weekly or No Recurrence. If you select Weekly, you must supply values for the remaining controls. If you select No Recurrence, no load instances will be created.
- Select the frequency of the interval by entering a number of weeks in the Recur every field.
- Select the day check boxes to indicate the days of the week to generate a load instance.
- Enter the number of loads that should be created from the plan for each selected weekday.
- Use the Start Date picker to designate the date to start creating load instances. Select or type in mm/dd/yyyy format. The Start Date must coincide with a day of the week you selected.
Designate the End Date by Selecting:
- No end date - Optimiz will continue creating loads forever.
- End after - Type or select a number in this field to create only the specified number of loads.
- End by - Select or type the end date in mm/dd/yyyy format for Optimiz to stop generating loads.
- Click Save Details to save the changes, Continue to continue entering plan details, or Cancel to discard them.

Result
The general details are added to the logistics plan.