Configure EDI Status Updates
Overview
EDI status updates configure how Optimiz should communicate with ProTrans customers on the current status of loads. Within Optimiz, these status updates are referred to as check calls. Specific entities can be excluded from EDI status updates for each role they occupy in the Customer Hierarchy.
Customer Outbound EDI 214 Updates
If selected, the customer will receive updates via EDI whenever ProTrans receives a check call from a carrier. To the customer, this will look like ProTrans is submitting an EDI check call as the carrier.
Process
To Configure EDI Status Updates at the Customer Level:
- Click the wrench for the Customer level of the customer hierarchy. See Access the Customer Hierarchy.
- Click EDI Configuration.

The EDI Configuration window opens.
- Click EDI Status Updates to view the status update options.
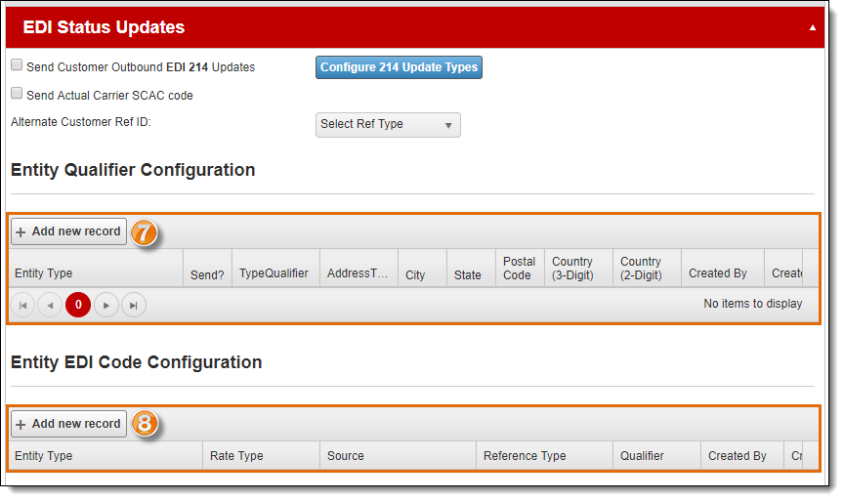
- Select Send Customer Outbound EDI 214 Updates if check calls should be sent.
- Click Configure 214 Update Types to determine how EDI 214 updates will be sent. See To Configure 214 Updates below for more information.
- Select Send Actual Carrier SCAC code to send the SCAC for the carrier entity assigned to the load holding the shipment.
- Select the Alternate Customer Reference ID if an alternative reference type should be used.

- Click Update to save the changes or Cancel to discard them. Scroll to the bottom of the window if the buttons are not visible.

To Configure 214 Updates:
- Select the EDI codes to use for each type of status update Event. Check Active to send the codes via EDI. If Latitude and longitude coordinates are to be included, check Send Lat/Long and select whether the format of the coordinates should be sent in Decimal Degrees or in Degrees, Minutes, Seconds from the dropdown menu.
- If you need to send separate files for each type of EDI status update, select Send one file per each EDI status update.
- Select the days on which Interval status updates will be sent. Click Clear Days to clear any days previously selected.
- Select if Interval status updates should be sent Every nth minute or Every nth hour.
- Select the Start Hour and End Hour for Interval status updates to be sent, or select All Day to send updates all day according to the options selected in step 4.
- Click Save to save the changes or Cancel Changes to discard them.
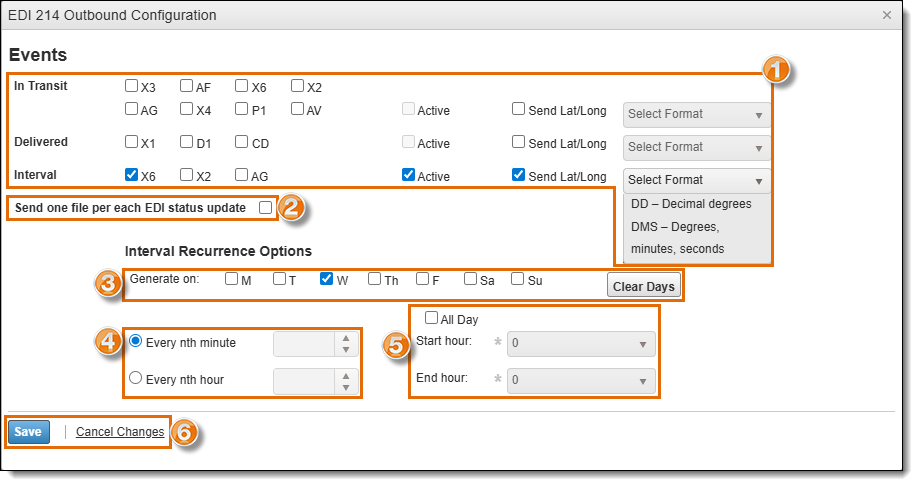
The EDI 214 Outbound Configuration window closes.
- Click +Add New Record to add entity qualifier configurations.
- Click +Add New Record to add entity EDI code configurations.
Result
Optimiz will send load status updates to the customer via EDI based on the configured schedule.