Configure Pre-Assigned Customer IDs
Overview
When should I configure pre-assigned customer IDs?
Add pre-assigned customer IDs to the Customer Hierarchy when the customer provides a range of identifiers that must be attached to each of their shipments.
Process
To Add a Pre-Assigned Customer ID:
- Open the Customer Hierarchy. See Access the Customer Hierarchy for details.
- Click the wrench at the Customer level.
- Click Pre-Assigned Customer ID.
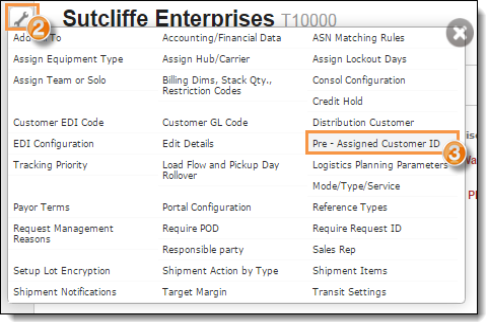
The Pre-Assigned Customer ID window opens.
- Click Add New Record.
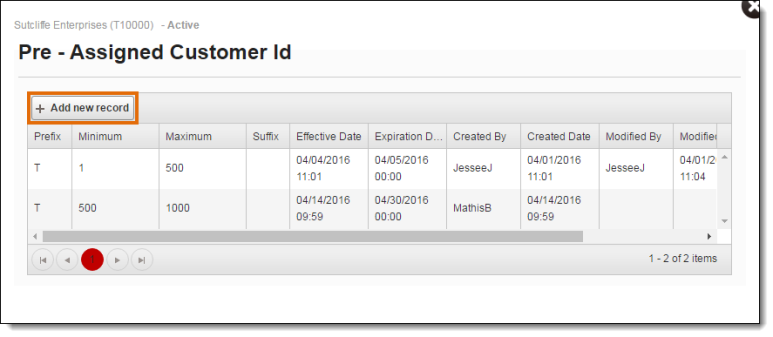
The Edit dialogue box appears.
- Enter any Prefix to be added at the start of each ID.
- Enter the Minimum number of the range of IDs.
- Enter the Maximum number of the range of IDs.
- Enter any Suffix to be added at the end of each ID.
- Enter the Effective Date of the current range of IDs.
- Enter the Expiration Date of the current range of IDs if needed.
- Select the Shipment Reference Type if necessary.
- Select the Load Reference Type if necessary.
- Click Update to save the range of IDs or Cancel to discard it.
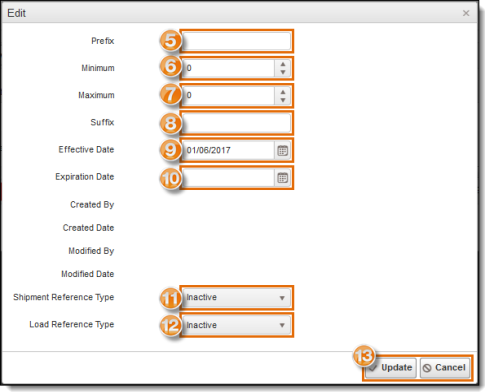
To Edit a Pre-Assigned Customer ID:
- Open the Customer Hierarchy. See Access the Customer Hierarchy for details.
- Click the wrench at the Customer level.
- Click Pre-Assigned Customer ID.
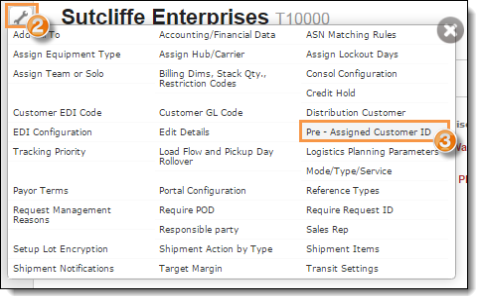
The Pre-Assigned Customer ID window opens.
- Click Edit on the line of the ID set to be updated. Scroll the grid to the right if the Edit button is not visible.
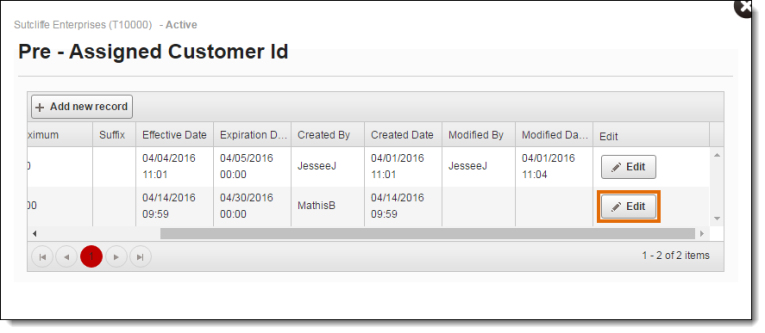
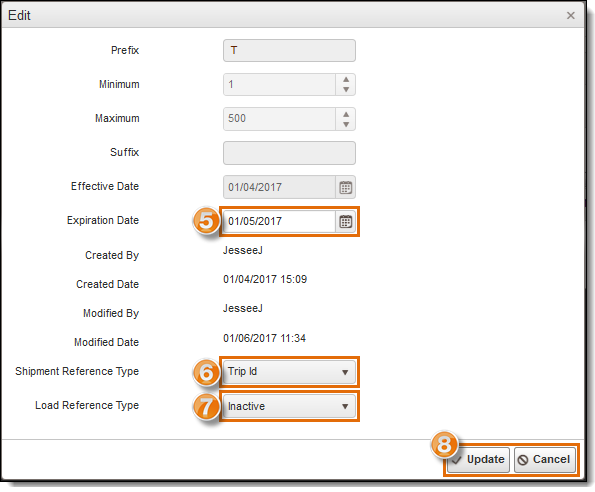
The Edit dialogue box opens.
- Update the Expiration Date if necessary.
- Update the Shipment Reference Type if necessary.
- Update the Load Reference Type if necessary.
- Click Update to save the changes to the ID set or Cancel to discard them.
Result
The range of pre-assigned customer IDs is added to the Customer Hierarchy and will be added sequentially to all shipments or loads created for the customer.