Add or View Shipment Items
Overview
The Supplier Portal can create a list of Shipment Items; these items are used to pre-populate Shipment Information during the Shipment Entry process.
Process
To Add/View Shipment Items:
- Search for the load on the Tracking page
- Select the load.
- Click Add/View Shipment Items.

- Click Add new record.

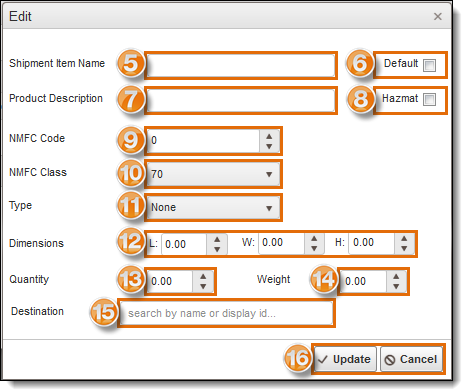
- Enter the Shipment Item Name (25 character maximum; alphanumeric; required).
- Select Default if the item being added is the shipment item most frequently used.
- Enter Product Description (25 character maximum; alphanumeric; optional).
- Select Hazmat if the item being added is Hazmat. If selected, enter the UN Number, Hazard Class, and Packing Group in the pop-up window that appears and click OK.
- Enter the NMFC Code (optional).
- Enter the NMFC Class (limited to the NMFC classes listed in the General Settings; optional).
- Enter the Type (limited to the Handling Unit Types listed in the General Settings; optional).
- Enter the Dimensions:
- Length (maximum 3 digits; default is 0; optional).
- Width (maximum 3 digits; default is 0; optional).
- Height (maximum 3 digits; default is 0; optional).
- Enter the Quantity (maximum 5 digits; default is 0; optional).
- Enter the Weight in pounds (maximum 5 digits; default is 0; optional).
- Enter the Destination (search by entity; optional).
- Click Update to save the shipment item or Cancel to discard it.

- The new shipment item appears in the Shipment Items grid.

To Edit a Shipment Item:
- Click Add/View Shipment Items.

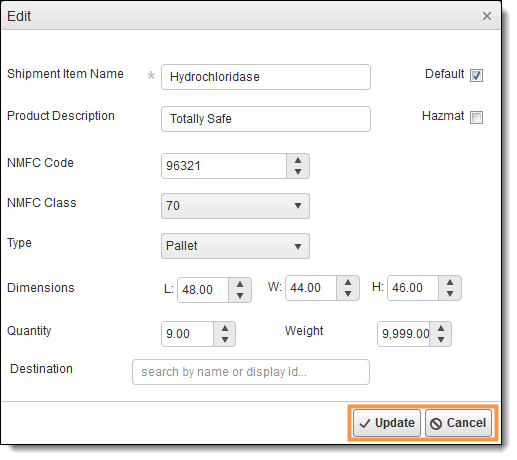
- Click Edit.

- Changes may be made to any field.
- When finished making changes, click Update to save or Cancel to discard.

Result
Any updates to shipment items are recorded.